Stalking Henny Penny

I speak for many when I say I love the grocery store rotisserie chicken. Any evening when I don’t have a plan for dinner, or when I have a plan but the plan doesn’t sound good to me, it’s off to Whole Foods for a delicious roasted chicken.

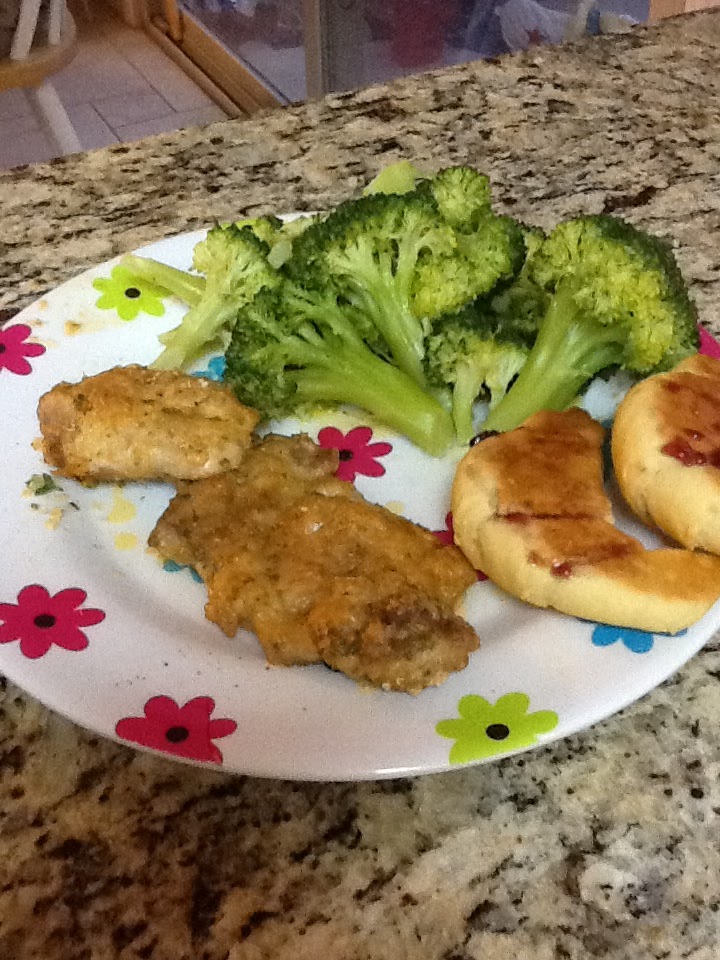
We like it just as it is, served with a vegetable and maybe some biscuits. And since, seeings as there are only two of us, we can only eat half, there is always the other half to use as a second meal.

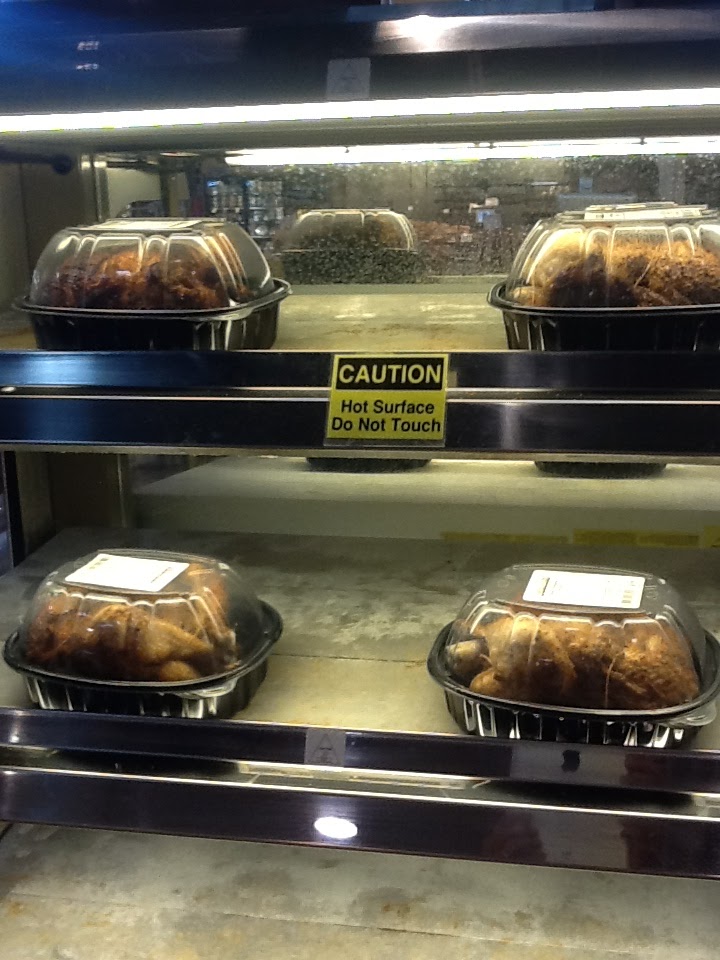
I went to Whole Foods the other evening expressly to get a roasted chicken for dinner. My plan was to eat half that night and to make chicken enchiladas the next night. When I got there at about 4:45, however, there were only four measly chickens on the platform. I glanced up at the rotisserie oven and saw that the birds looked brown and yummy and ready to package up and put out. Ah ha, I thought. I bet they put out fresh chickens at 5. I’ll wait for a hot roasted chicken.

So I wandered around the store. I looked at the cheeses. I stopped at the olive bar and filled up a container with olives and pickles. I checked out all of the great looking sausages. I went back to the roasted chicken rack. There were only three chickens sitting there. It was 5:03.

That’s okay, I thought. I’ll wait a bit longer. I went to the produce aisle and filled my basket with the makings for my salsa verde that I would use with my chicken enchiladas the next night. It was 5:10. I went back to the chicken rack. There was one lonely chicken, and it proudly boasted that it was unsalted. Unsalted? I glanced at the people behind the counter and no one appeared to be getting chickens ready to put out. Rats.

So I went back to the meat area and asked the butcher to cut one of the big rib eye steaks in half the long way. We would go to Plan B and have panfried steak. On my way to the checkout I walked by the chicken rack. That poor unsalted, unloved chicken was still sitting there all by himself.

The store was busy and the line was long. I was second in line when I glanced back at the deli area and saw that a young man was putting roasted chickens in containers. Yippee! I left my place in line without a backward glance and asked the young man if I could have one of the chickens he was preparing. Of course, he said.

I went home with a hot, delicious chicken for dinner, though the process took longer than I thought it would. And the next night, just as I planned we had chicken enchiladas. Double duty.

Stacked Green Chili Chicken Enchiladas

Ingredients
12 tomatillos, husked and rinsed
2 jalapenos, stemmed
1 onion, quartered
Splash white vinegar
Water
1 t. ground cumin
½ bunch fresh cilantro, coarsely chopped
2 limes
Salt
1 pint green chili (homemade or store-bought)
1 deli roasted chicken
½ bunch fresh cilantro, chopped
Salt and pepper to taste
12 corn tortillas
Cheese

Process
Make the salsa verde: Put the tomatillos, jalapenos, and onion in a saucepan with the vinegar and water to cover. Bring to a boil, reduce the heat and poach for 10 minutes. Drain. Put the vegetables in a blender, add the cumin, and puree. Add the cilantro, lime juice, and salt. Pulse to combine.

Bring the green chili to a simmer. Fold in the chicken, cilantro, salt and pepper.

Preheat oven to 350.

To assemble, place some salsa verde on the bottom of a 9 X 13 pan, and cover with corn tortillas. Layer the green chili/chicken mixture, the salsa verde, and the cheese two or three times. Bake uncovered for 30 minutes. Let sit a few minutes before cutting into the dish.

Old School

My husband and I like to watch the Food Network television show Restaurant Impossible. In this show, Chef Robert Irvine goes into a failing restaurant and in two days and with $10,000, transforms it into a new, improved eatery with a hip interior and a slick, cool new menu. We are then to assume that the restaurant goes on to be successful, though we never know that for sure.

The thing that amuses both Bill and me is that at the end, all of the restaurants look basically the same, and the menus are pretty much interchangeable. Oh, there might be a few differences if the themes are different – Italian, Greek, hamburger joint, etc. But in the end, most of the restaurants are very much the same. We recently had the occasion to dine at Irvine’s Nosh restaurant on Hilton Head Island, and yes, you guessed it, it looks just like the restaurants on the program. Funny.

I thought about this recently when Bill and I went for pizza at one of our favorite Denver-area dining spots, Bonnie Brae Tavern. Bonnie Brae has been in business for 75 years, and I have been eating pizza there for almost 35 years. In that time, the menu hasn’t really changed much and the pizzas are just as delicious now as they were the first time I ate there. Yummy crust and fresh, delicious ingredients, but nothing fancy. No fancy white sauces, no clams, not an arugula leaf to be found.

Likewise, the décor is about the same as it has been for at least the 35 years I have been eating there. I’m sure the turquoise leather has been replaced a time or two, but it nevertheless, remains turquoise leather. The wall is lined with beer neon signs with the cords exposed as they snake over to the plugs. It feels like home. (Not that I have beer neon signs in my kitchen, but you know what I mean.)

I contrasted this to another restaurant where I ate today with a niece who is visiting from LA. Sassafras American Grill is in the beautifully gentrified Highlands area of Denver, and the restaurant is located in a lovingly and beautifully remodeled old Victorian home. While not the fresh, contemporary look typical of, say, Robert Irvine’s restaurants, it still is beautifully hip (and quite delicious, I might add). The Cajun-flavored offerings are absolutely yummy.

Still, Bill and I are definitely old-school. As such, I feel very much at home sitting on the turquoise leather seating that makes Bonnie Brae a favorite. Oh, that and the crunchy crusts on the scrumptious pizzas!

Speaking of pizza, here is how I make a grilled pizza that tastes almost like the pizzas we got in Italy.

Preheat your grill while you prepare your ingredients. Divide pie crust into individual portions and roll it out as thin as you can. I generally buy my crusts at Whole Foods, but you can certainly make your own.

While your grill is getting hot, warm some olive oil in a pan, and throw in a crushed garlic clove. Let the oils from the garlic flavor the olive oil, and then brush the olive oil on both sides of your individual crusts.

Put your ingredients in bowls and take them with you out to the grill, along with the crusts. I recommend very simple ingredients. Maybe you will want to brush a little tomato sauce on the crust after it has cooked on one side. Perhaps you will put on a little cheese. You can add some garlic or maybe a little prosciutto or few slices of pepperoni.

Once your grill is preheated, carefully place the crusts (on which you have brushed some garlic-infused oil) directly onto the grill rack. One web site recommends that you put your crust on a piece of aluminum foil that you have floured and slide it from the foil onto the grill. I have generally just used my hands. However you do it, this is probably the trickiest part. But you can do it!

At this point, don’t walk away from the grill. Keep your eyes open as you watch the crust begin to bubble. It really only takes a minute or so. Once the bottom of the crust has gotten a little charred, turn the crust over using tongs. Brush more oil onto the crust, and quickly put on your ingredients. Close the lid and let the pizzas cook and the cheese melt (if you used cheese) for a few more minutes – probably no more than five. Keep your eye on the pie. Delicious.

Bleeding Orange

I happen to live in Denver, Colorado, where today – the opening day of the professional football season – we host the Baltimore Ravens in the year’s NFL season opener.

If you have happened to stumble upon my humble blog ramblings and you live in Seattle, or Miami, or St. Louis, or (heaven forbid from a Bronco’s standpoint) Oakland, you may just substitute your team name and your team color.

Today, here in the Mile High City, we are bleeding orange.

I undertook an early morning trip to the grocery store, and it tickled me to see how many people were already wearing the Bronco colors of blue and orange. Of course the store employees were wearing Bronco garb; likely, they are required to show Bronco affiliation to get a paycheck. However, shopper after shopper, old and young alike, were already in their Bronco clothing. Heck, I have to admit that I was wearing my Bronco shirt and a pair of orange flip flops!

The same was true when I took two of my grandchildren to the zoo. Many of the people looking at the zoo animals were wearing their beloved orange and blue. I’m happy to say the animals were spared.

I grew up in a football loving family. You learned to love the Cornhuskers in vitro if you live in Nebraska. So my sisters and I are just as likely as my brother to sit in front of the television on any given Sunday to watch the games. And cheer. And boo. And cover our eyes. And complain about the officiating. And take walks if the score is too close (well, actually that’s just me).

As a single mother for many years, I taught my son to love football as well. And he is a true fan. He not only will be in his Bronco shirt in front of his television tonight, but his two poor, helpless girlies (both of whom would rather be wearing a Princess Ariel dress) will be in their Bronco shirts because he is convinced that is necessary for the Broncos to win. Not that he’s superstitious or anything.

And what will we be eating as we watch the game? I am going to disappoint all of you. We will not be eating either orange or blue food. We will not, in fact, be eating anything vaguely related to football or tailgating. Alas, on the menu tonight is tilapia. I have a Weight Watchers weigh-in tomorrow.

Pan-Fried Tilapia

Ingredients
2 tilapia filets
½ c. seasoned all-purpose flour
1 T. butter
1 T. olive oil
1 lemon

Process
Melt the butter together with the olive oil in a nonstick fry pan. Dip your filets in the seasoned flour and shake off the excess. Place the filet in the hot pan and let it sear for a couple of minutes, until it’s browned on the first side. Turn over, and do the same on the second side. Remove the filets to a plate and cover. Squeeze the juice of a lemon into the pan with the butter and oil. Stir until you have a nice pan sauce. When serving the tilapia filets, pour the pan sauce over the fish, and serve with a side of lemon.

Try not to look at the disappointment on your husband’s face when he sees you aren’t serving chicken wings.

Go Broncos!

Slurping

Today I ate noodles with two of my granddaughters, both of whom love noodles.

I don’t think I have ever come across a noodle I didn’t like. I particularly like the long, skinny kind that you try with great persistence to wrap around the fork, and then just finally quietly work into your mouth using that same fork.

(In our travels in Italy a few years ago, we learned that the Italians wouldn’t even consider cutting their long pasta. They instead wrap and wrap and wrap it around their forks, without the use of a spoon. If all else fails, the Italians will slurp.)

So will my granddaughters. And one of the best things about being a grandparent is that you aren’t necessarily responsible for teaching your grandchildren their manners. So it was with great joy that I challenged the two of them to a noodle slurping contest. For the next two minutes, the sounds of slurping filled the kitchen. The 3-year-old won handily. Nobody slurps like a toddler.

As I said, I like noodles of all kinds. The two little girls prefer Asian noodles – especially ramen and pho. Here is a simple recipe for ramen noodles that I got from Rants From My Crazy Kitchen.

Easy Homemade Ramen Noodle Soup

Ingredients
1 package Chinese noodles
12-16 c. chicken broth
2 carrots peeled and diced
2 stalks celery, diced
2 scallions, thinly sliced
1 clove garlic, minced
1 T soy sauce
1 t. sesame oil

Process
Bring the broth to a boil in a large pot. Add the carrots, celery, scallions, and garlic. Reduce heat to medium and cook until vegetables are soft. Add in the noodles, soy sauce, and sesame oil. Continue cooking for 3 minutes.

Walmart Wonderings

I am not one of those folks who inherently hates Walmart. I have never quite understood some people’s knee-jerk loathing of this admittedly enormous retail giant.

In fact, I often shop at Walmart. I don’t love it, but I do it when I need certain items that, like it or not, are cheaper there. (And I am nothing if not a tightwad.) Still, Walmart shopping is one of my least favorite activities.

This is from a person who loves grocery shopping. (I can almost hear a symphony of groans.) However, since I am retired, I have the luxury of wandering through a grocery store looking at the various kinds of meats or cheeses, comparing prices on different brands, trying the samples, perhaps even sipping on a pumpkin spice latte, skinny, no whipped cream, that you can buy at the Starbucks that is located in every single solitary grocery store in the United States (even if there is a Starbucks in the same shopping center).

So, today as I shopped at Walmart, I decided to pass my time by observing certain phenomenon that caught my eye.

Why, for example, do so many male Walmart shoppers elect not to push the cart in a normal way, as would any woman shopper? Instead, so many men walk beside the cart and steer it from the side. Do they think it looks more masculine that way? And how do they control the cart? I would (and this is without a doubt) run the cart into a rack of t-shirts selling for $7.47 each.

And, speaking of that, why is that t-shirt $7.47? Why not $7.25 or $7.50, or round up to, say, $8?

And I love to see what they place up at the cash registers for people to ponder as they wait in line. When you look up impulse check-stand shopper in the dictionary, there I am. I have purchased many things that I didn’t know I couldn’t live without while waiting in line. Pipe cleaners. Nascar Bic lighters (and I don’t smoke or watch Nascar). Paula Deen’s magazine. Rachael Ray’s magazine. Weight Watchers Magazine (which I wouldn’t need if I didn’t cook out of Paula Deen’s or Rachael Ray’s magazines).

Nevertheless, my weekly shopping is done. And tonight I’m cooking for three of my granddaughters, ages 5, 7, and 10. I will make them the yummy chicken dish that I got from Pinterest for which I don’t really know the name. I have seen it called Heroin Chicken. I call it Buttery Chicken. Simply can’t serve my grandkids anything with heroin in the name.

Buttery Chicken

Ingredients
4-6 boneless chicken breasts or thighs
2 c. grated Parmesan cheese
3 T. parsley
2 T. dried oregano
3 t. paprika
1 t. pepper
1 t. salt
½ c. melted butter

Process
Preheat oven to 350 degrees. Combine the grated cheese and the seasonings. Line a shallow baking pan with aluminum foil. I also place a sheet of parchment paper on top to help avoid sticking.

Melt the butter in a pan. Dip each piece of chicken into the butter, and then into the seasoned cheese, coating completely. Arrange in a single layer on the pan. Pour any remaining butter over the chicken.
Bake for 30-45 minutes, until nicely browned.

It’s Like Buttah…..

Last night Bill and I went out to dinner with our son, his wife, and their two daughters, ages 5 and 3. Both of them are dealing with colds, so their appetites weren’t necessarily up to par. Nevertheless, here is what they ate for dinner:

Yes, ladies and gentlemen, their dinner consisted of eight or nine packages of butter. They started out with bread-and-butter, and then I guess they just figured the bread slowed them down.

Being the nana, I pretended to act shocked. The truth is, were I but 55 years younger, I would also eat plain butter.

Here is a recipe that satisfies my love for butter:

Kentucky Butter Cake

Ingredients
3 c. flour
2 c. sugar
1 t. salt
1 t. baking powder
1/2 t. baking soda
1 c. buttermilk
1 c. butter
2 t. vanilla
4 eggs

3/4 c. suguar
1/3 c. butter
3 T water
2 t. vanilla

Process
Preheat oven to 325 and grease and flour a 10 in. bundt pan.
Mix together the flour, 2 c. sugar, salt, baking powder, and baking soda. Blend in the buttermilk, 1 c. butter, 2 t. vanilla and 4 eggs. Beat for 3 min. at medium speed, and pour batter into prepared pan. Bake for 60 min. or until a wooden toothpick inserted into the center comes out clean. While still warm, poke holes in the cake using toothpicks or a fork. Let cake cool completely.

Butter sauce:
In a saucepan, combine the remaining 3/4 c. sugar, 1/3 c. butter, 2 t. vanilla, and the water. Cook over medium heat until melted and combined, but don’t boil.

Once cake is completely cool, pour sauce over the entire thing.

Yum.

Eating With Bugs

When it comes right down to it, I’m not sure why people like picnics. While you have the opportunity to eat your food at a clean and dry kitchen table without getting bitten by mosquitoes, you choose instead to eat at a very dirty table surrounded by bugs and other of God’s not-so-stellar ideas (though I’m sure they are all part of his plan and he didn’t ask me), eating with and on plastic.

Having said that, I will tell you that I love picnics. Always have. Always will.

My mom was a good picnicker. Several times in the summer she would pack up a basket or box of picnic standbys — fried chicken, cole slaw, deviled eggs, and her Three-Day-Dill pickles – and schlep it all out to Pawnee Park, along with the rest of us. She would lay a tablecloth on the picnic table and set out the picnic. My brother and sisters and I would play on the playground toys for a bit and then join her and my dad for our picnic dinner.

My husband and I picnicked our way through France a few years ago. We speak no French, and since the language is not intuitive to me (what with all them thar silent letters), and the French people have little-to-no interest in helping out, ordering food in a restaurant was a bit intimidating. Picnics were the answer. We could sign language our way in the grocery markets to getting a baguette, some pate, some olives, a hunk of smelly cheese, and some wine. Many a meal was spent at a table along the side of a road (ideally underneath one of the really beautiful crucifixes many French grape growers had at the corner of their vineyards) or even just on the bed of our hotel room.

I’m happy to say that my love for picnicking has been passed on to my grandkids, all of whom love to take food out to the nearest park and eat. They agree with me that, despite the bugs, everything tastes better outdoors.

Here is my mom’s cole slaw recipe.

Let’s Make a Dill

The members of my family are big fans of the pickle. Really, fans of anything that is pickled. And I’m not just talking about adults. As a toddler, one of the few vegetables my great-nephew will eat is my dilly beans.

Every summer when the pickling cucumbers were in season, Mom would make her delicious Three-Day Dill Pickles. My assumption is that they were called Three Day Dills because once you made them, you were supposed to wait three days to eat them. They never lasted three days in my family. In fact, after about an hour, one of us (usually my father if he was home) would quietly take one of the barely-pickled cucumbers out of the brine and begin snacking. By the third day, there was nary a pickle to be seen.

At one point, she had a big porcelain jug into which she would submerge her cukes. I don’t know what happened to that jug. I mostly remember her placing the cukes into a big green porcelain mixing bowl, pouring over the hot vinegar, adding the dill, and putting a dinner plate over the cucumbers. She would set a big can of tomatoes on top to make sure the cukes remained submerged. We got good at fitting our fingers under this plate.

Three-Day Dill Pickles

Ingredients
1-1/2 lbs. small pickling cucumbers
2 pints water
1 c. vinegar
1/8 c. salt
4 large sprigs of dill (or two fresh dill heads)

Process
Wash the cucumbers in cold water. (I let them soak for a couple of hours in ice water. My mother never did.) Cut the cucumbers in quarters and place them in a large non-metal bowl. Place the dill over the top of the cukes. Bring your remaining ingredients to a boil and pour over cukes. Cover with a plate so that the liquid covers the cucumbers.

Let sit for three days on your counter. Right. On the off-chance that you have any left after three days, they may be stored in a jar in the refrigerator.

Hi there!

As I set off on this blogging adventure, I am reminded of all of the nature shows I have watched, or all of the children’s books I have read, that show a little baby chick pecking its way out of its shell to enter the world. That’s me. Just another chick entering the world of blogging.

And from what I can see, there are plenty of other chicks out here on the internet telling their stories. And many of the blogs (and the stories) are very good. My story might be a little unique in that I am telling it from the perspective of a very happy, um, more mature adult instead of a 20- or 30-something mother of small children (whose stories, by the way, I love to read, even if only to breathe a sigh of relief that my children are grown.)

I am 60. That is by no means old in this day and age. If it was 1850, I would be the old crazy woman living up in the cabin in the woods smoking black, stinky cigarettes and making medical potions from herbs. As it is, I am not old, arguably not crazy, I live smack dab in the middle of a city with my husband of 20-some years, and have never smoked a cigarette in my life.
They say life begins at 50. They say 50 is the new 30. And so on. However, when I pick up a Glamour or Shape magazine while waiting to undergo my bone density scan, I notice the headline says, “How to Stay Beautiful at 20, 30, and even 40!) I am serious. Apparently there is no hope post-49. Luckily, my husband thinks I’m beautiful.

I am lucky enough, though, that I have been able to retire at a fairly young age, after being in the workforce nonstop in some capacity since I turned 14. Furthermore, except for twinges of arthritis, I am pretty darn healthy. I am also lucky enough to have nine wonderful grandchildren, seven of whom live very near us. I am Nana. Being Nana is the best job I have ever had. I am also Bill’s wife (another good gig), a mother and stepmother, a mother-in-law, a sister, an aunt and great-aunt, and a friend to many. I have been truly blessed by God.

What do I do all day? Quite honestly, I am rarely bored. I stay very busy exercise. I take care of our home. I cook. I work on puzzles. I read voraciously (I probably average two-and-a-half books a week). I geocache (do you know what that is?) I spend time with my grandkids. And now I write.

As time goes on, I hope you will enjoy meeting and getting to know my quirky family and friends. We are plentiful in number, if nothing else. When gathered together, there is always a lot of energy, a lot of laughing, a lot of children, and always, always, always, a lot of food.

This week, I want to share some of my mom’s best recipes. It won’t be the last time.

I grew up in east central Nebraska, in an area not known for its peaches. Corn, yes; peaches, not so much. Nevertheless, every summer my mom would make peach pie out of fresh summertime peaches, and it was oh so good.
Now I live in Colorado, where our Western Slope peaches are arguably some of the best in the country. Take that Georgia. You have better football teams.

One of the things that prevents many people from making homemade pies is the crust. It’s intimidating. If you find it too intimidating, use a store-bought crust. They aren’t as good, but they’re good enough. However, consider making this crust, as I find it simple and tasty. The vinegar does something that makes the crust flaky and delicious.

Peach Pie
Ingredients
5 c. sliced, peeled peaches (about 7 medium peaches)*
1 t. lemon juice
1 c. sugar
¼ c. all-purpose flour OR 2-1/2 T tapioca
¼ t. cinnamon
2 T butter
Sugar

Process
Mix peaches and lemon juice. Stir together sugar, flour or tapioca, and cinnamon. Mix in with the peaches. Turn into your lined pastry pan, and dot with the butter. Put on your top crust, and crimp. Using a pastry brush, brush top with an egg wash or cold water. Sprinkle a generous amount of sugar over the top crust. Take a scissors or sharp knife and cut several holes in the pastry. Place pie on a baking pan and bake at 425 degrees for 35 to 45 mins. until top is golden brown.

Flaky Pie Crust
Ingredients
2 c. flour
1 t. salt
1 c. cold shortening
1 egg
½ c. ice cold water
1 t. white vinegar

Process
Mix the flour with the salt. Using a food processor**, cut in one cup shortening.
Break the egg into a measuring cup and mix; add enough of the ice water to bring it to ½ c. Add the vinegar to the ice water. Pour into the flour mixture and pulse it until it’s mixed. It is a very sticky dough.
Divide in half and wrap each half in wax paper. Chill for at least an hour before using. This step is critical as I cannot emphasize enough, it is a very sticky dough.
Roll out into a 9-inch pie pan. Keep the other half in the fridge until it’s time to top your pie.

Notes
*To easily peel the peaches, drop them into boiling water for 45 to 60 seconds, remove them, and drop them in ice water. If the peaches are nice and ripe, the skins will come right off. If the peaches aren’t quite as ripe, it will take a bit more work.
** Pioneer women didn’t use a food processor, so you don’t need to either; it just makes it a bit easier. If not using a food processor, just mix together using a wooden spoon.