Whit’s Fur Ye’ll No Go By Ye

Denver Public Schools (probably just like public schools in most metropolitan areas) contain a diversity of students that frankly, is one of the best things about public education. All of my grandkids (well at least the ones that go to school) are in public schools. That’s appropriate, because my grandkids also represent a bit of diversity.

Tonight Bill and I will be attending Southmoor Elementary’s Multicultural Night. This celebration offers the students a chance to acquaint their fellow students and families with their culture and background. My McLain grandkids will be representing their Scottish heritage.

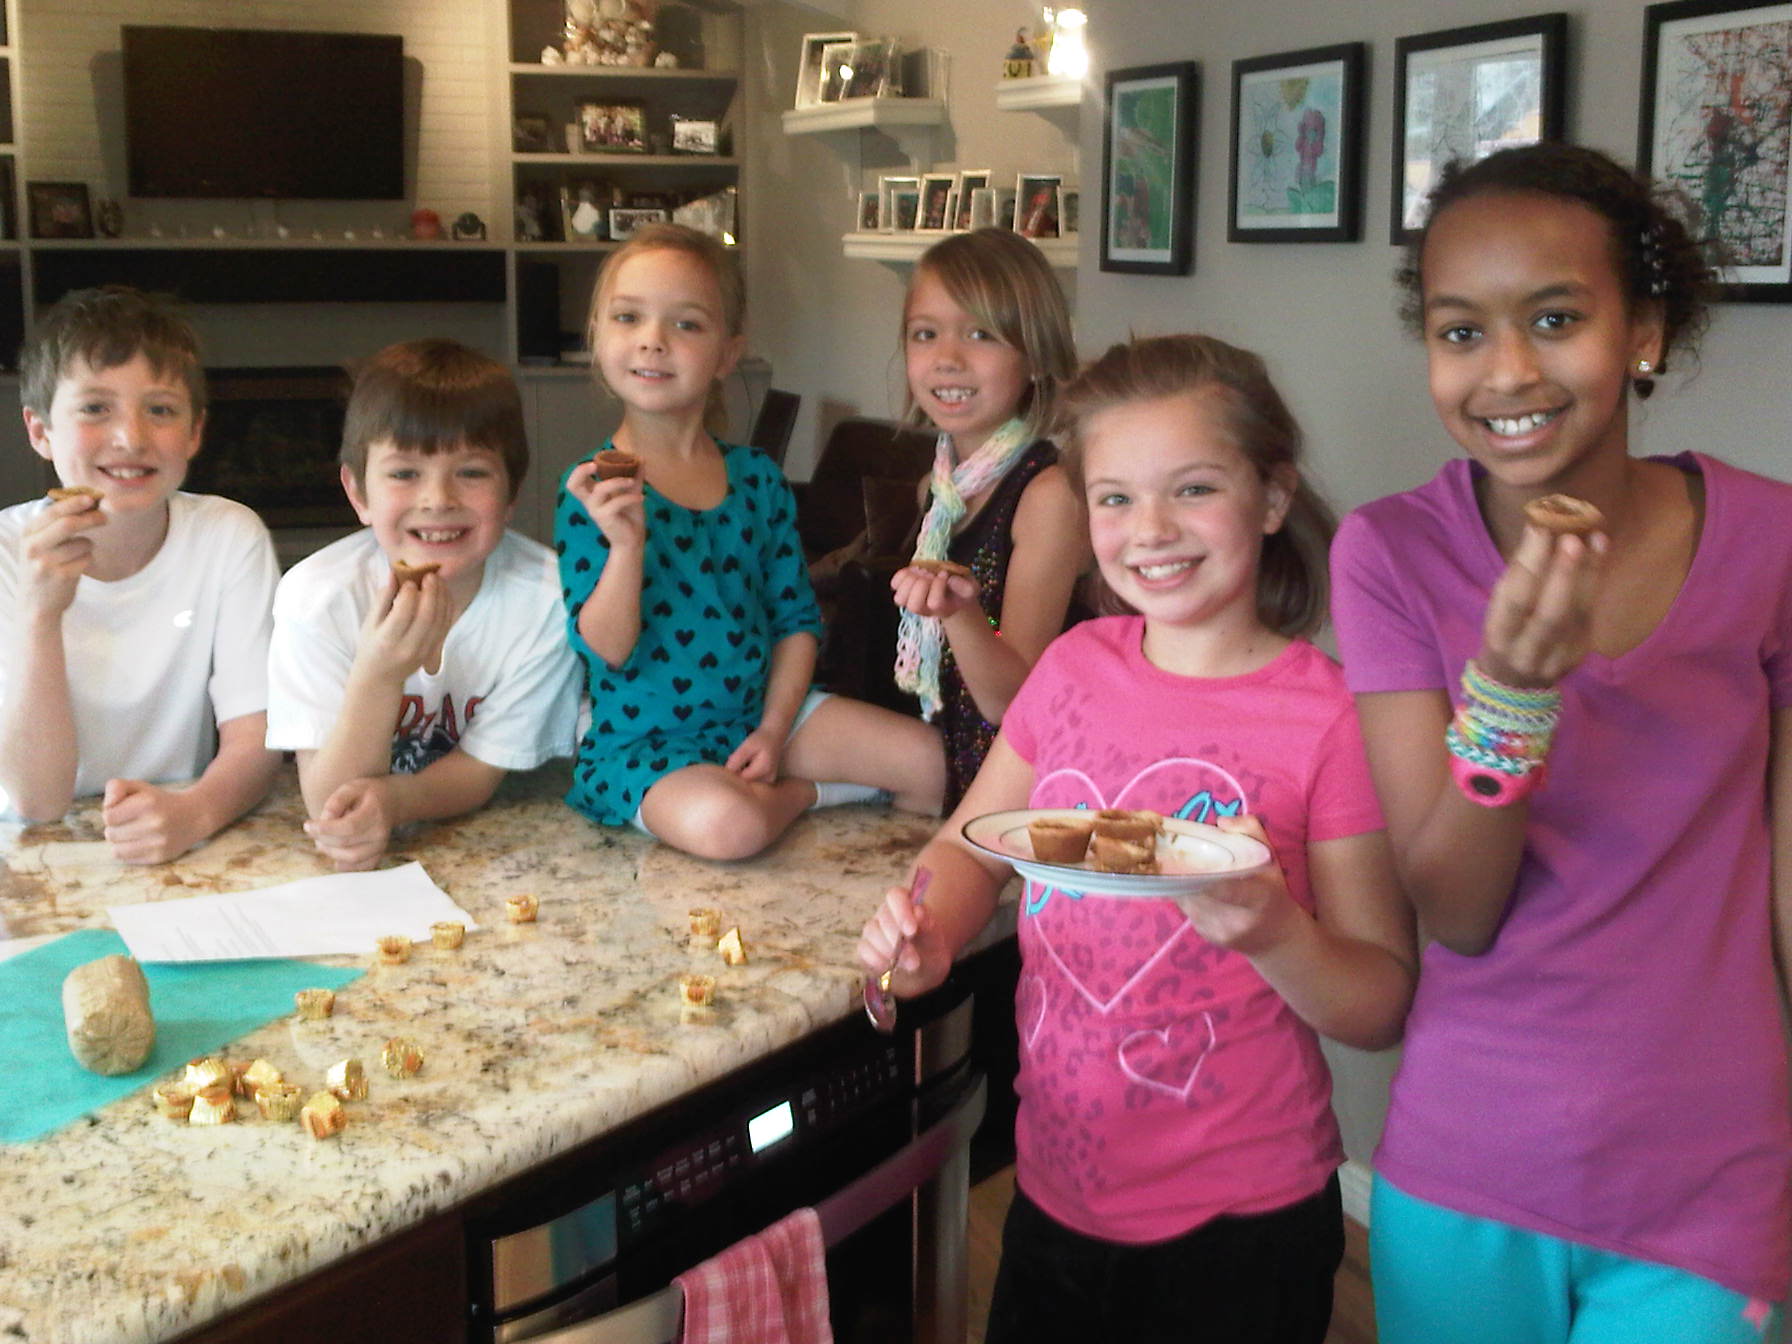
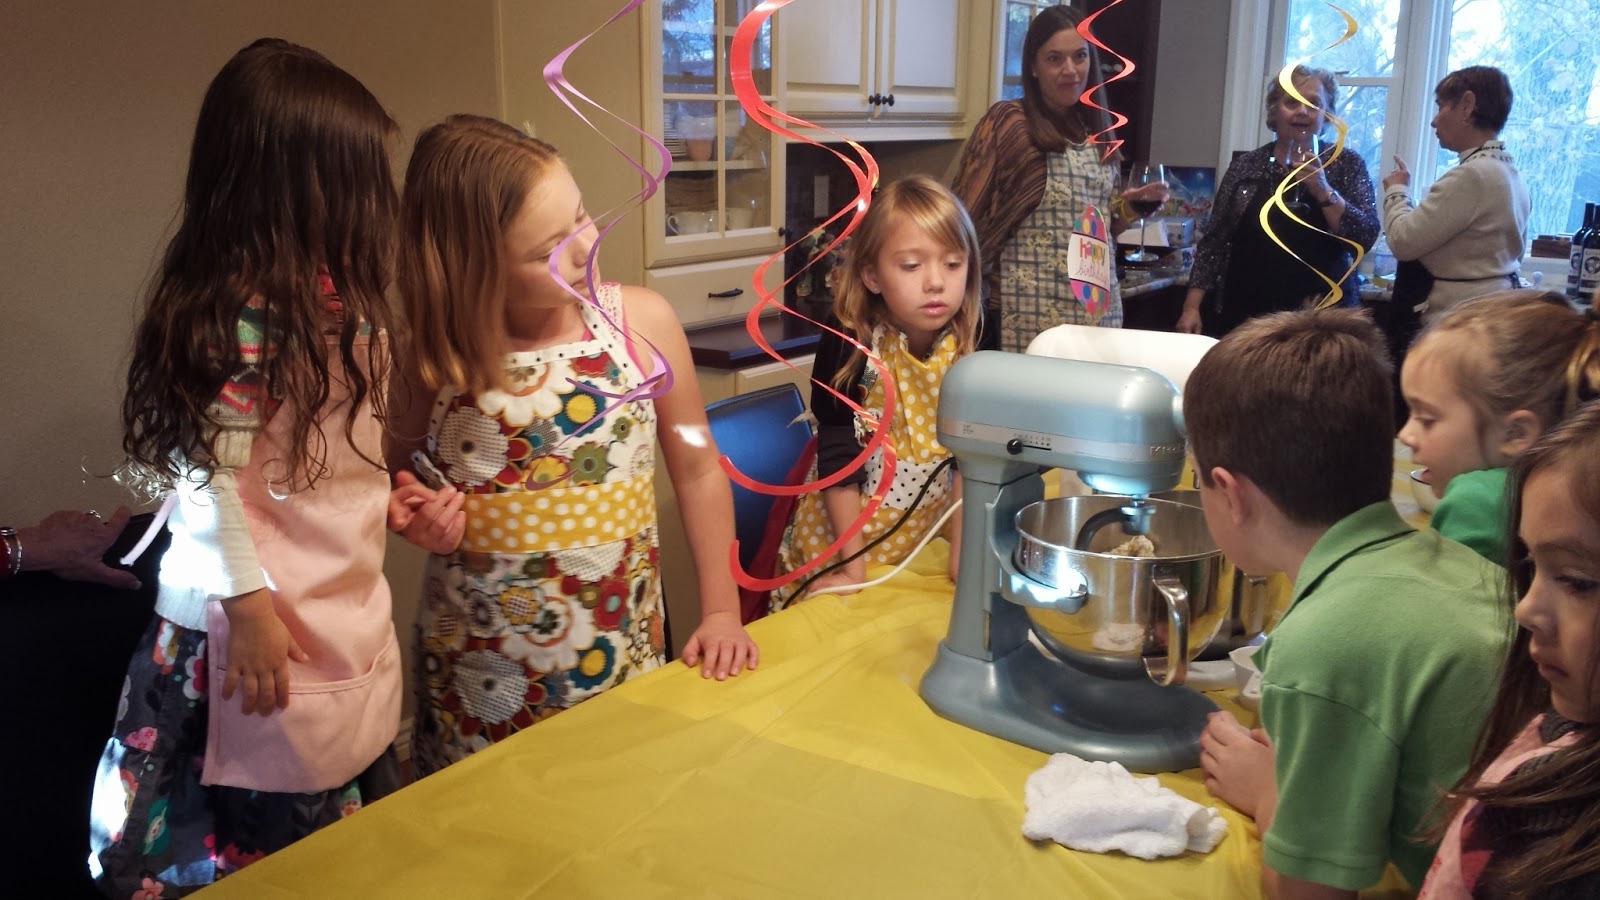
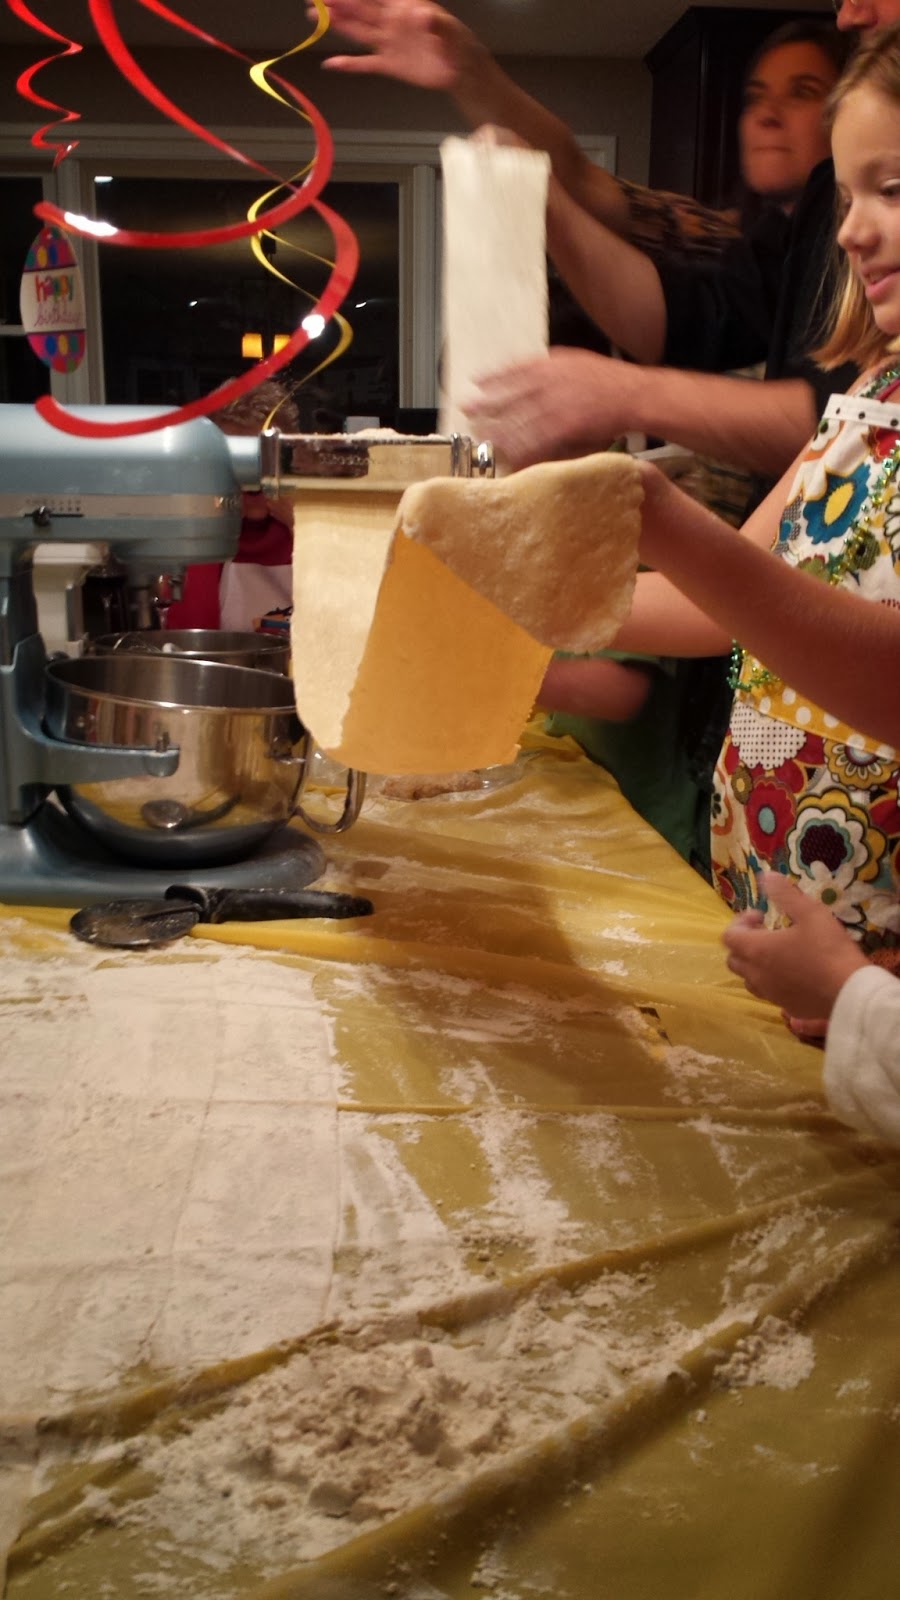
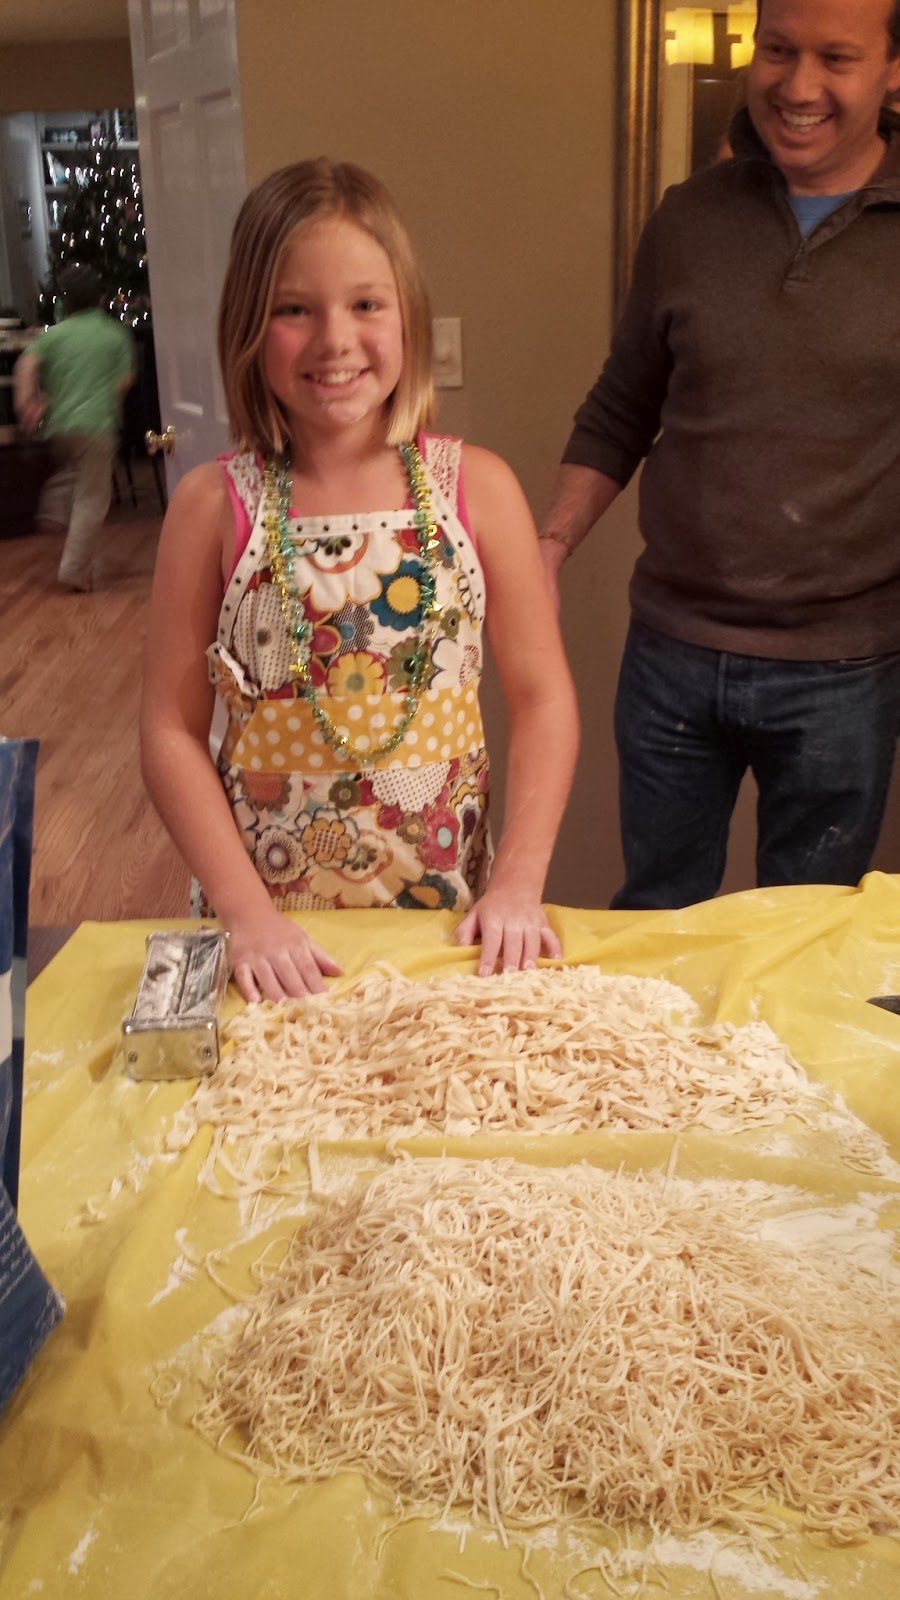
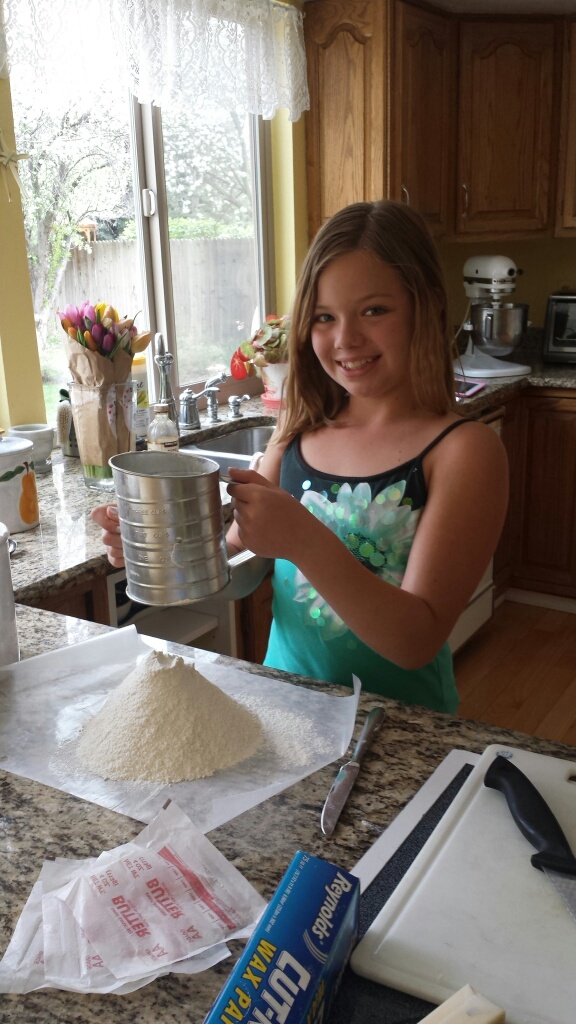
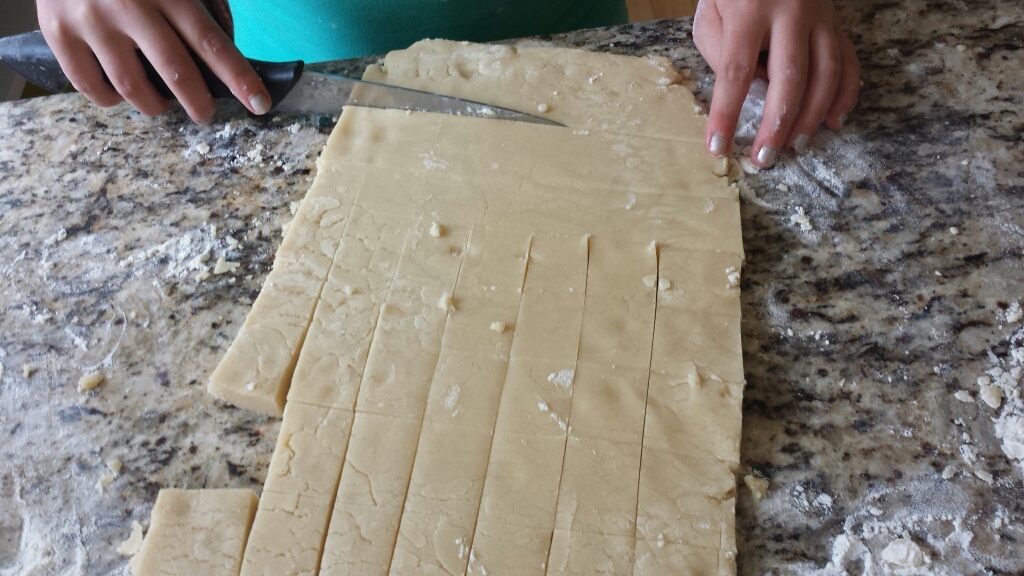
Well, David McLain and his first-born – Adelaide – take this charge very seriously. Addie and I have been baking shortbread for several days now (shortbread being the delicious sugar-like cookies traditional to Scotland. They are yummy for sure.

20140503_140426_resized

20140503_145213_resizedBut David and Adelaide McLain don’t stop at shortbread. Oooooooh noooooo. It wouldn’t be an evening about Scotland without a haggis.

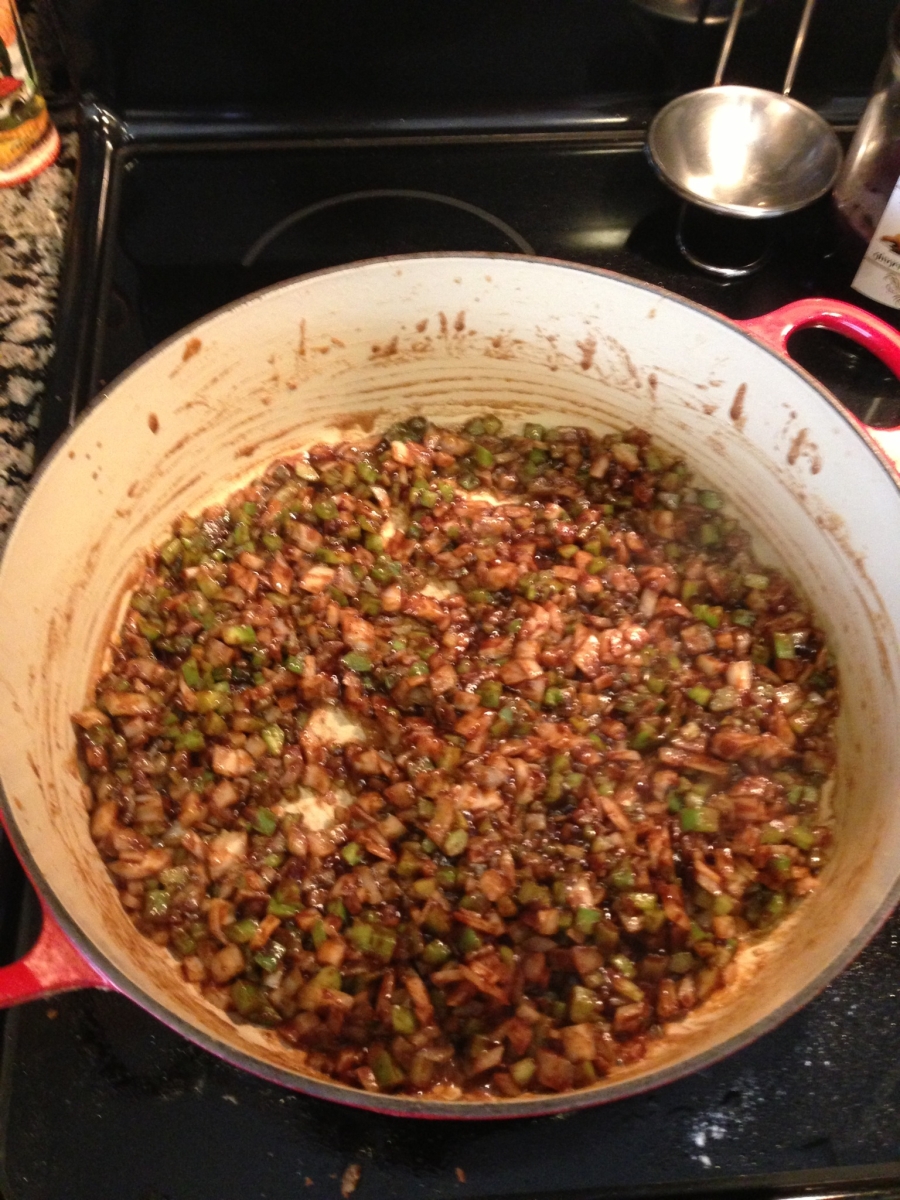
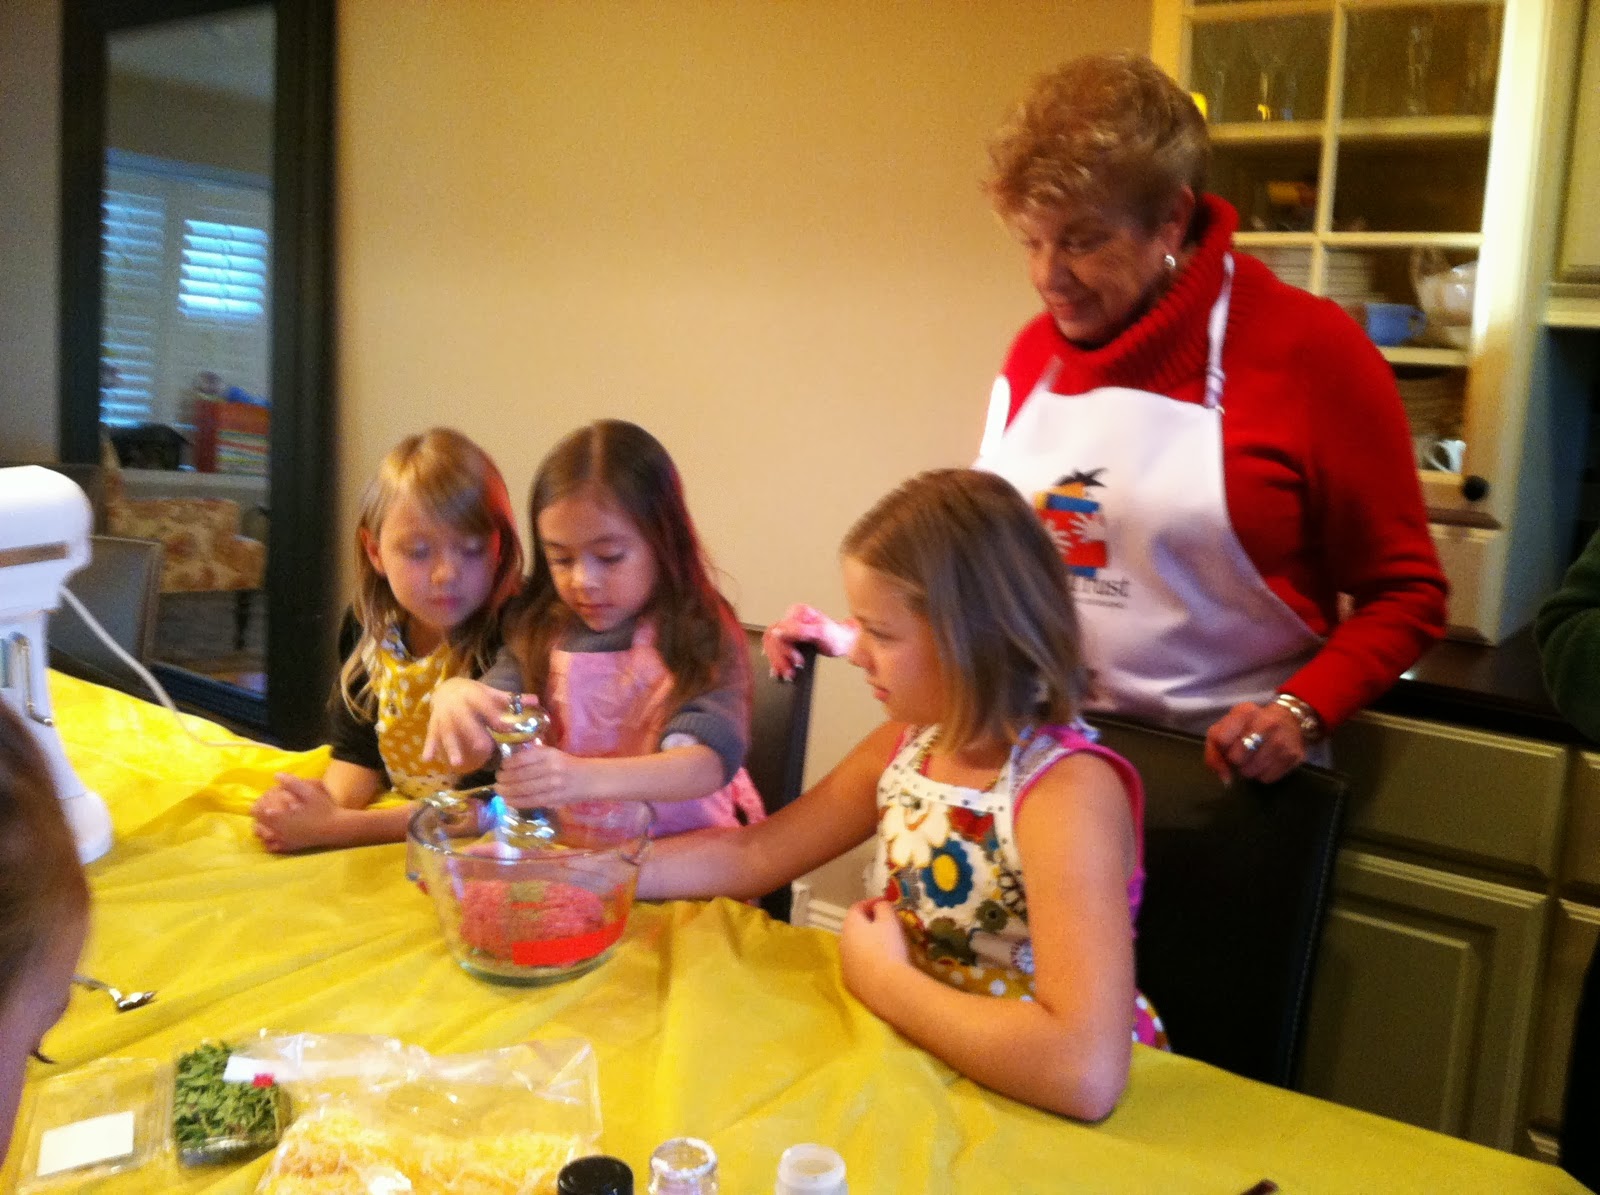
I’m not going to tell you what a haggis is. Check this link. Suffice it to say that the two Scots made it from scratch. They minced the sheep internal organs, mixed it with the oats and other ingredients, and wrapped it in a lining of sheep stomach. Well, to be honest, a sheep’s stomach is the traditional lining; I think they used a synthetic stomach. This afternoon the “package” will be steamed 10307420_10203127034632910_8438006049064611259_n
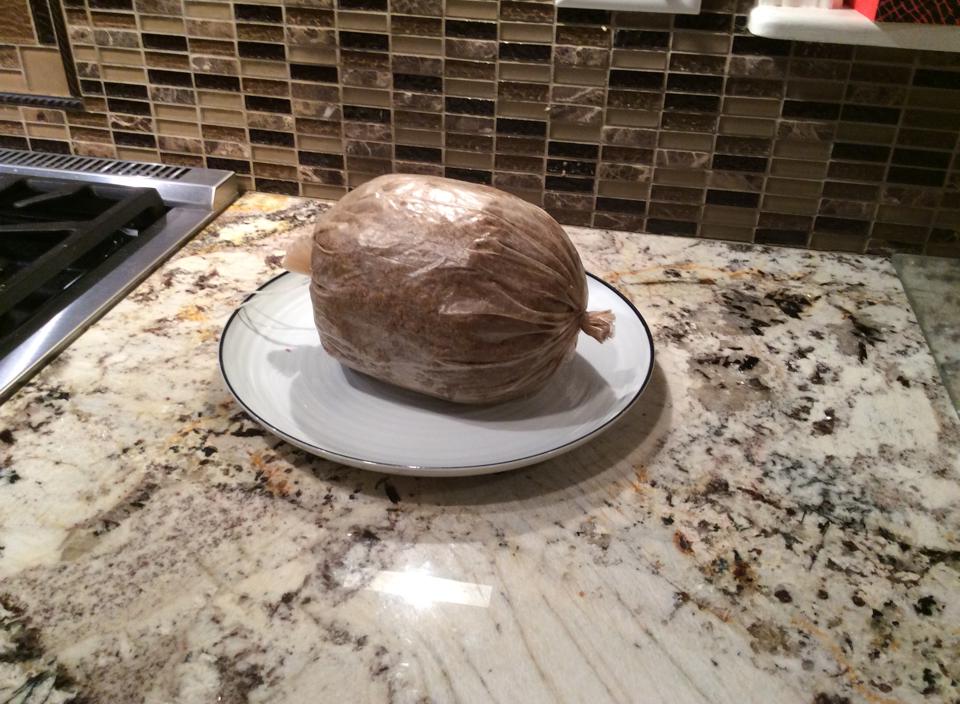
for three hours in the family kitchen. God bless my daughter-in-law.

If David has his way, he will have a friend pipe in the haggis. What does this mean? It means someone will be playing a tune (can you call it a tune?) on a bagpipe as they ceremonially bring in the haggis. At this point, traditionally, someone recites the Address to a Haggis. Initial plans called for that person to be Addie. I don’t think that’s going to transpire as she does have other homework!

Address to a Haggis, by Robert Burns

Fair fa’ your honest, sonsie face

Great chieftain o’ the pudding-race!

Aboon them a’ ye tak your place

Painch, tripe, or thairm:

Weel are ye wordy o’ a grace

As lang’s my arm.

The groaning trencher there ye fill

Your hurdies like a distant hill,

Your pin wad help to mend a mill

In time o’ need,

While thro’ your pores the dews distil

Like amber bead.

His knife see rustic Labour dicht

An’ cut you up wi’ ready slicht.

Trenching your gushing entrails bricht,

Like ony ditch;

And then, O what a glorious sicht,

Warm-reekin, rich!

It goes on for five or six more stanzas of – well, I really don’t know what to call it. At the line in the third stanza: His knife see rustic Labour dicht the speaker normally draws and sharpens a knife, and at the line An’ cut you up wi’ ready slicht, plunges it into the haggis and cuts it open from end to end. Apparently this ceremony is a highlight of the evening. I’m hoping against hope that the two don’t plan on having Adelaide slit open the haggis. Please God.

David will undoubtedly wear his kilt (in which he got married, by the way). I don’t think 9-year-old Alastair owns a kilt yet, but it is most certainly in his future. Bill would probably wear his except for the fact that I will be picking him up at the airport as he returns from Chicago and we will be driving directly to the school. Praise God.

One quick Scotland story. Shortly after we were married, Bill and I traveled to Scotland along with David’s girlfriend (who is now his wife), and our son Court. We met up with David (who had spent a semester studying at the University of Edinburgh in Scotland), and his brother Allen who was traveling around Europe. We arrived at our bed and breakfast in Glasgow. Bill sent me to check in while he unloaded the car. When I arrived, I told the proprietor my name, and spelled it: McLain. With a typically Scottish disdain, the man said to me, “You don’t spell your name correctly. It should be MacLaine.”

“It’s not my name,” I told the man. “I married it.” With a huff, he gave me the key.

By the way, the title of this post is a Scottish proverb for “What’s meant to happen will happen.

Guid cheerio the nou!

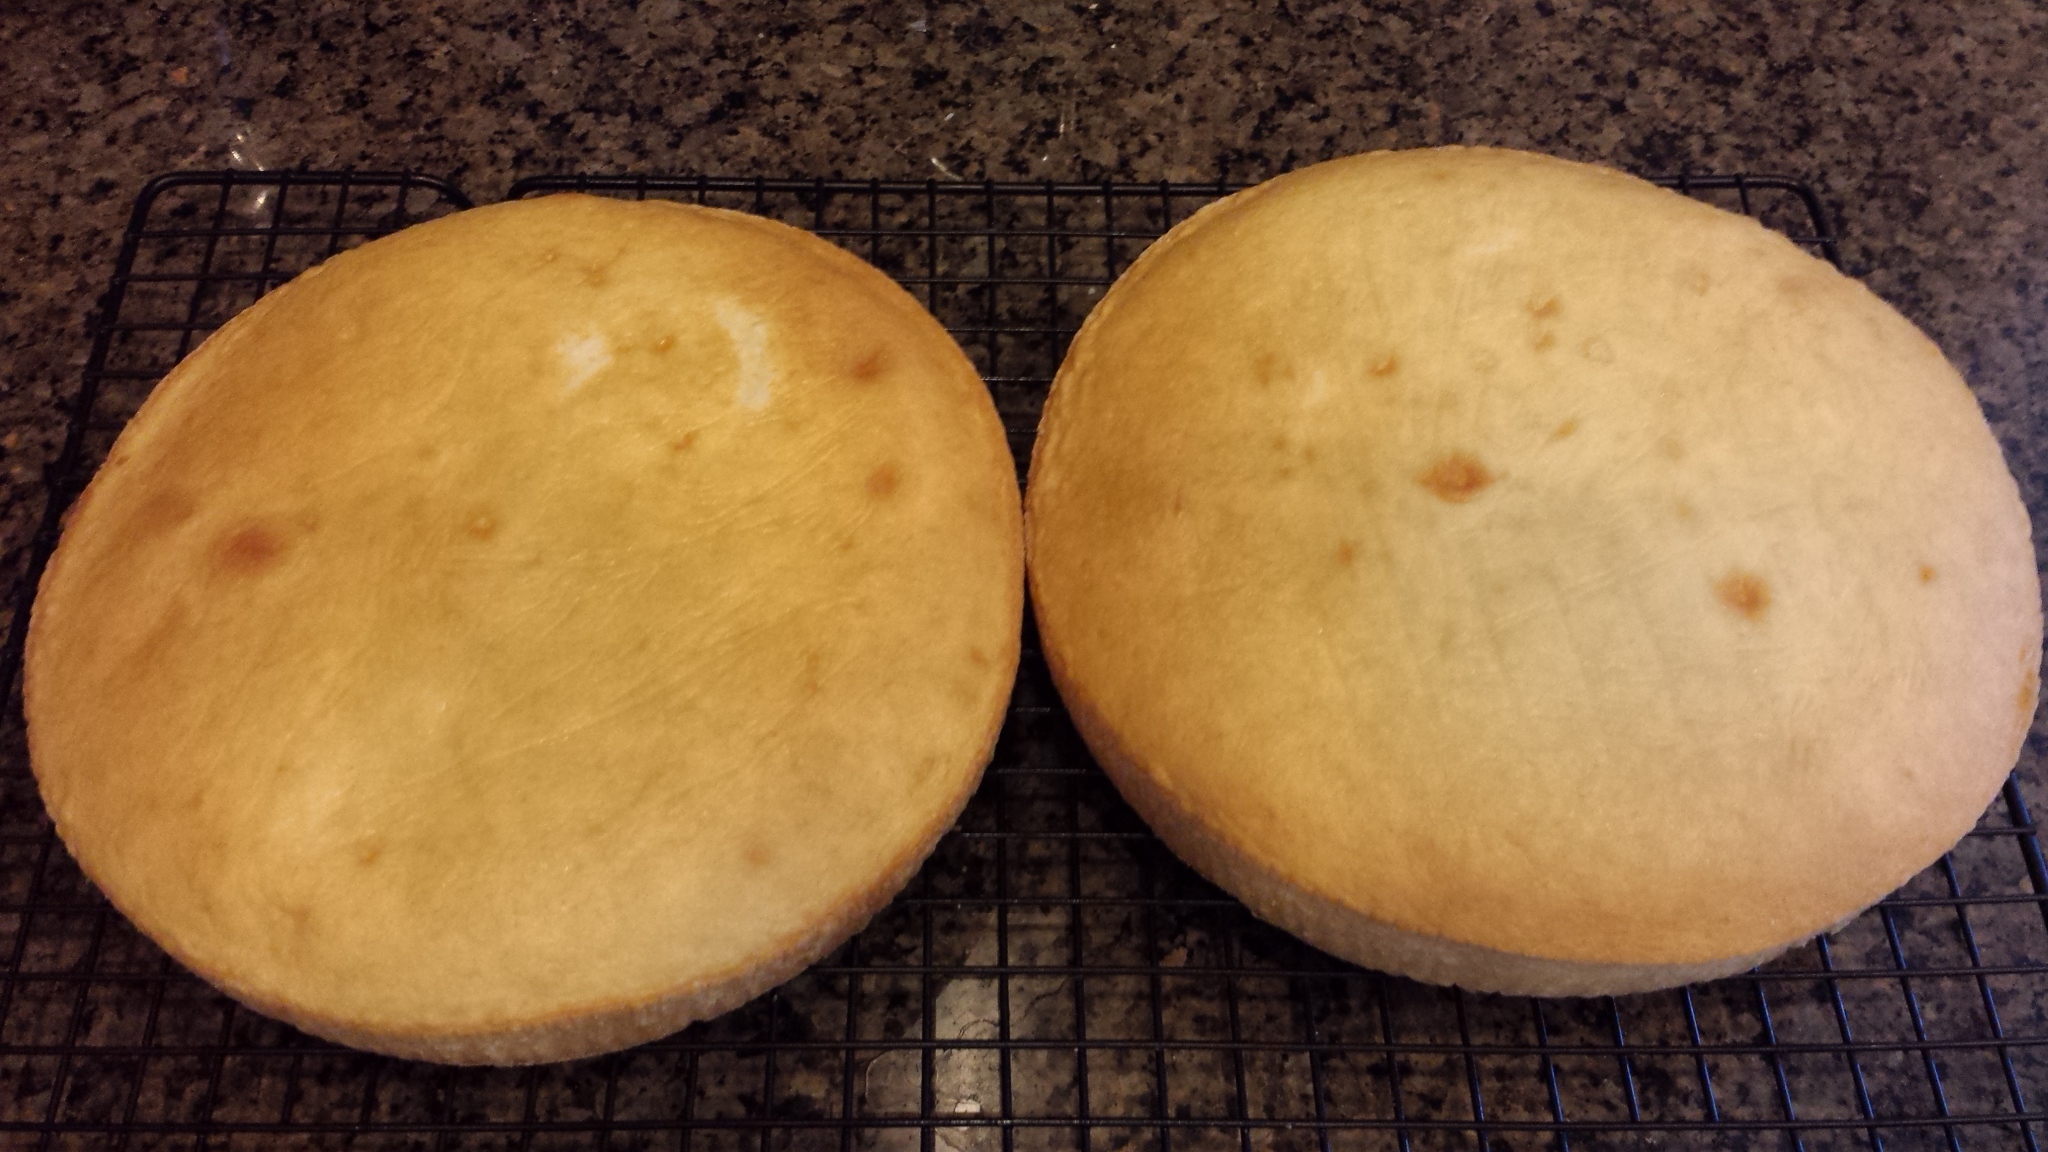
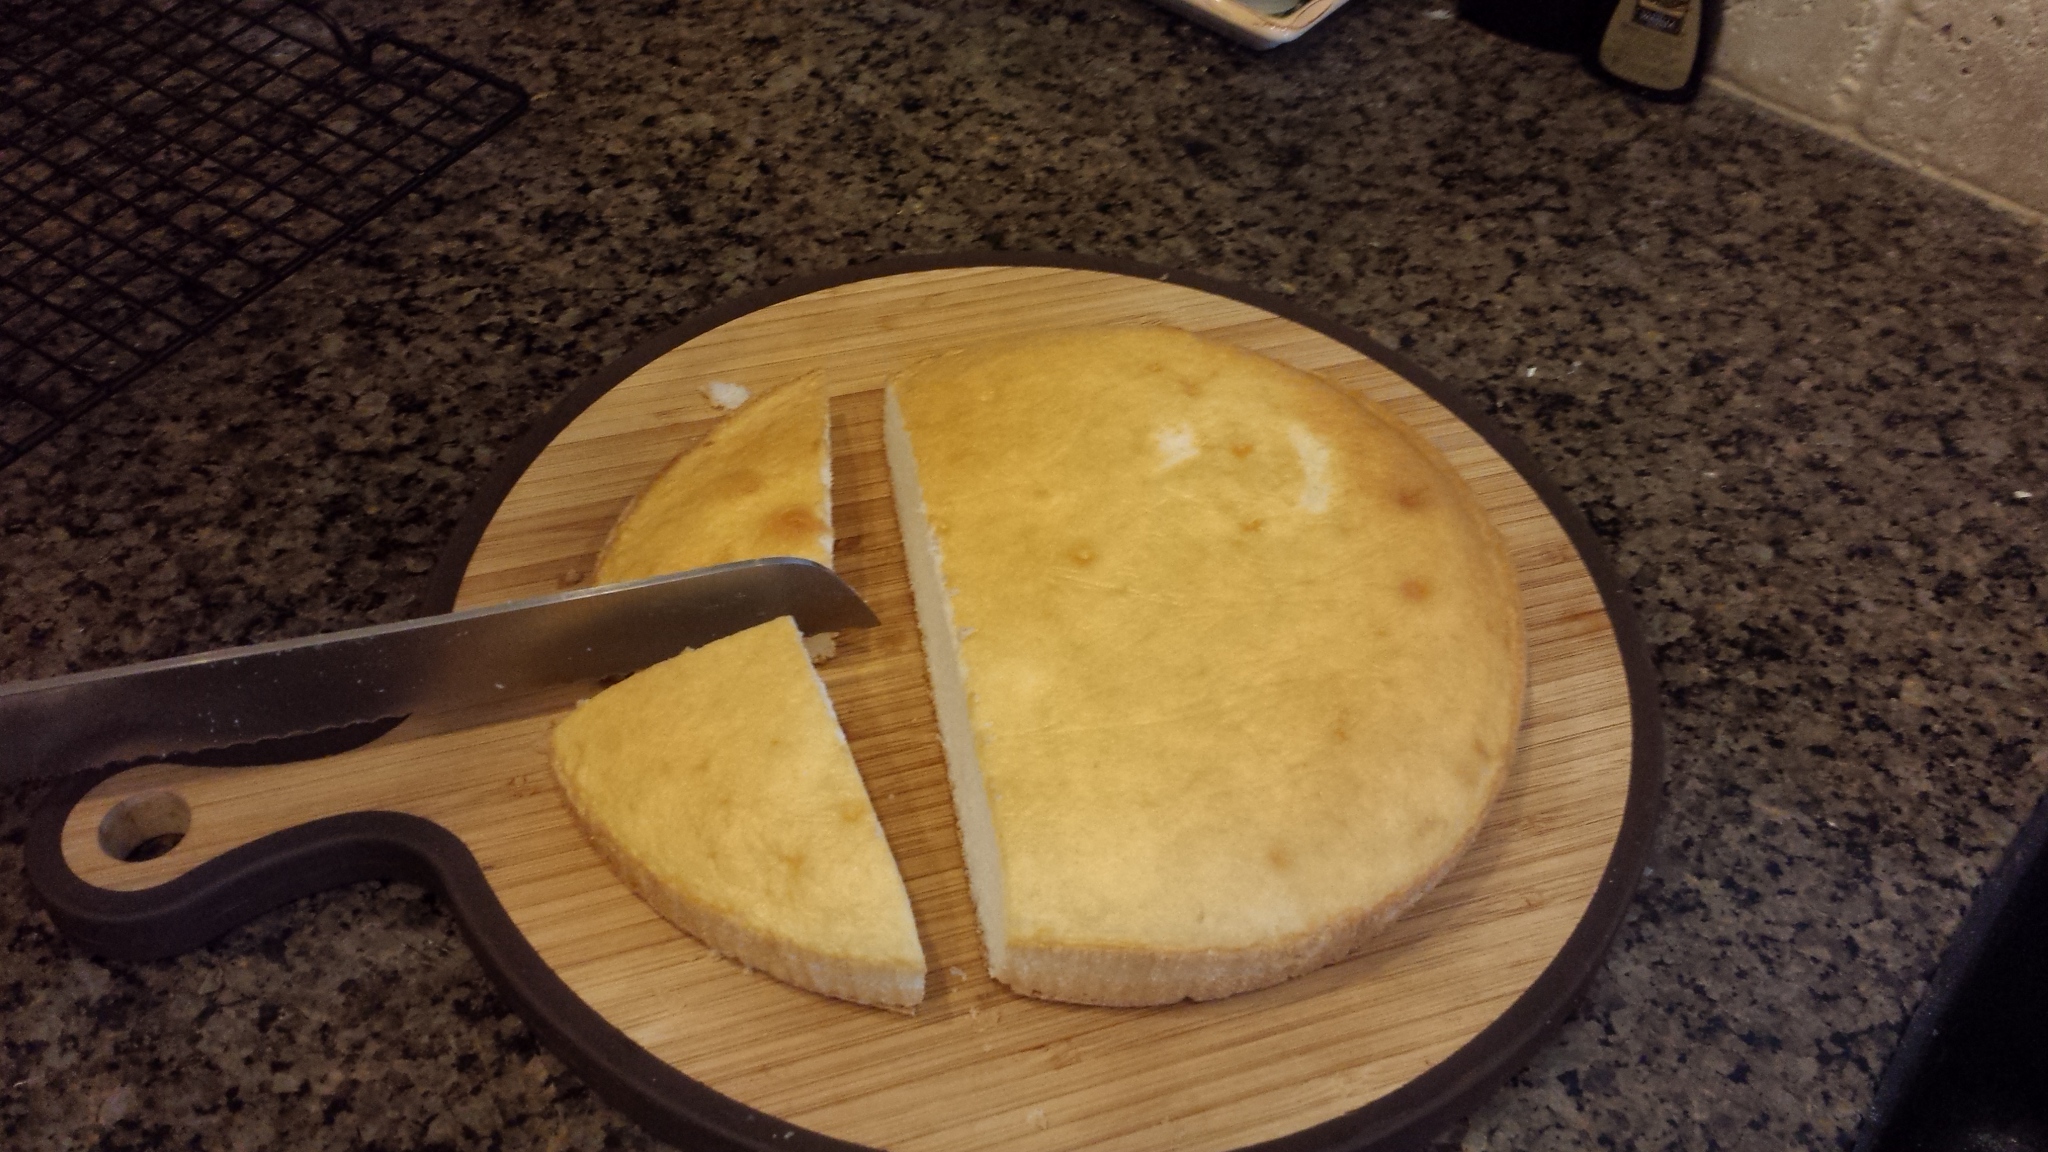
Traditional Scottish Shortbread

Ingredients

3/4 lb. unsalted butter

1 c. white sugar

1 t. vanilla

3-1/2 c. all-purpose flour

1/4 t. salt

Process

Preheat the oven to 350 degrees.

In the bowl of an electric mixer fitted with a paddle attachment, mix together the butter and sugar until they are just combined. Add the vanilla. Sift together the flour and salt, then add them to the butter and sugar mixture. Mix on low speed until the dough starts to come together. Dump onto a surface dusted with flour and shape into a flat disk. Wrap in plastic and chill for 30 minutes.

Roll the dough 1/2 in thick and cut into the desired shape. Place the cookies on an ungreased baking sheet and sprinkle with sugar. Bake for 20 to 25 minutes, until the edges begin to brown. Cool on a rack.

Nana’s Notes: This, unfortunately, is one of those recipes that really requires (or at least works MUCH better) with a large Kitchen Aid mixer. The dough simply doesn’t come together otherwise. Don’t let your dough chill more than 30 minutes because it becomes practically unworkable. Addie and I rolled the dough out into a rectangle, and then cut the cookies into squares. However, you could certainly use cookie cutters. One recipe I saw called for pressing the dough into a cake pan, cutting the dough like you would a scone into triangles, and then baking. After the cookies are baked, you would then have to again cut the cookies on the indent. Lots of options. By the way, if you don’t have a big mixer, give it a try with a smaller mixer. The dough likely won’t come together, but you could still press it into a cookie sheet. They won’t be quite as pretty, but hey, how can you go wrong when your recipe is butter and sugar and vanilla?


Wascally Wabbit

croppedI had one of those bolt-up-in-bed moments a week or so ago when something popped into my head that I hadn’t thought about in 45 years.

Every Easter, Gloor’s Bakery sold bunny cakes.

I texted my brother.

“Remember Dad’s bunny cakes?” I asked him.

“Yes,” he responded. “But in my mind they are mom’s bunny cakes. I remember doing the jelly beans and colored toothpick faces under her guidance.”

Hmmmm.

I texted Jen.

“Do you remember that we sold bunny cakes at the bakery at Easter?” I asked.

“Yes,” she replied. “Mom was very enthusiastic about her bunny cakes at Easter time.”

Really?

The reason that surprises me is that Mom generally didn’t get particularly enthusiastic about bakery holiday rigamarole. And she heartily disliked cake decorating. And yet she apparently liked making these bunny cakes. Who would have guessed?

They were very cute, and we sold a whole lot of bunny cakes every Easter as I recall. They were decorated and stored in the freezer. I remember opening the freezer door and having 15 or 20 pairs of jelly bean eyes staring back at me.

I asked Bill if he would be interested in trying to recreate the bunny cake. He agreed and that’s how we spent yesterday morning.

Here’s a tutorial. Don’t expect miracles. I am not Ree Drummond.

I baked a two layer white cake. I chose to use a cake mix since I wasn’t sure how it would turn out. I baked it the night before and put the two layers in the freezer so they would be easier to work with….

two cakes

I cut one of the cake layers in half, and stood each half upright for the bunny’s back….

put together


I cut ends from the second layer, then cut them in half to use for the bunny’s head and tail….

head and tail

Bill did a lot of sculpting. I don’t remember my mom doing any sculpting…..

glued together

I iced the cake and covered it in sweetened coconut. At this point it looks like a 1956 Chevy that has been left out in a snow storm. No rabbit resemblance….

old buick snow

Aha! Add a pair of cardboard ears and the whole world changes…..

taking shape


A couple of toothpicks and some jelly bean eyes and nose, and you have yourself a reasonable looking rabbit. Bill constructed the white picket fence. He simply can’t stop himself…

ta da 3

The final result….

ta da 4

Nana’s Notes: I am very satisfied with my end product, but I am quite certain Mom did no sculpting, so I’m not sure how she made the head and tail. Bec and/or Dave will know, and will tell me. I also think my bunny ended up bigger than the ones we sold at the bakery. That likely has something to do with my head and tail.


Laissez Les Bon Temps Rouler

Cousins take a break from play on top of the hot tub!

Cousins take a break from play on top of the hot tub!

The Gloor clan really doesn’t need much of an excuse to party. You would think with all of the birthday celebrations as of late, the family would be ready to spend a weekend staring at the television without one tortilla chip or bratwurst or niece or aunt or cousin in sight.

Well, instead we found a reason to party that didn’t include a single tortilla chip or guacamole dip, and there was nary a hot dog bun in the vicinity. After all, Lent is approaching, which means….

MARDI GRAS!!!

Some explanation is necessary, since many of you know that Mardi Gras is French for Fat Tuesday, and Fat Tuesday is the day before Ash Wednesday, and Ash Wednesday isn’t until next week. Here’s the thing. None of the family that works for a living can actually celebrate on Fat Tuesday since, in order to work for a living, they have to actually, well, work. It makes sense to have it the weekend before. But next weekend didn’t really work for several reasons. First, I will be in Denver visiting kids and grandkids. Second, my brother Dave and Bill will be at the Phoenix NASCAR race on Sunday. Third, there is – yes, you guessed it – a conflicting birthday celebration for my great niece MacKenzie Rose who is turning 8.

But if you want a party, you have a party. And son of a gun, we had big fun at Bec’s house on Sunday afternoon at her second-annual Mardi Gras party.

It was New Orleans all the way. Bec made muffalettas as appetizers (and you know it’s going to be some kind of good food if muffalettas are the opening act). Muffalettas are yummy sandwiches made with a delicious olive salad and a variety of meats such as Genoa salami and ham, with provolone and Swiss cheeses. Seriously? How can you possibly go wrong?

I made the jumbalaya, using Erik’s recipe featured a couple of weeks ago on this blog. The star of the show was Erik’s gumbo made with chicken and sausage. Gumbo starts with a roux Eriks Roux(a mixture of flour and some kind of fat). For it to have that characteristic wonderful rich flavor, the chef has to nurse the roux to a perfect deep brown color without waiting a minute or two too long for it to burn. Comes with experience, and it was magnificent.

Bec offered maque choux, sort of creamed corn on steroids and another traditional New Orleans offering. For dessert she made a King’s Cake. Traditionally, a King’s Cake (another New Orleans Mardi Gras standard) is sort of a coffee cake, dyed purple, green, and yellow. Somewhere inside the cake is hidden a little plastic baby. The person whose piece hides the baby has good luck for the next year. Bec hid no plastic baby inside the cake, so we all had the good luck of not being in danger of choking.

Jenna enjoys a break from Rainbow Looming to eat her dinner.

Jenna enjoys a break from Rainbow Looming to eat her dinner.

The best part about these gatherings is the sound of the kids  – now totaling 11 – playing together. Well, admittedly three-month-old Faith and one-month-old Lilly didn’t play a lot; they mostly slept. Sometimes they divide up by age, but this time the kids divided up by gender. The girls disappeared around the side of the house where they were barely seen most of the afternoon. They eventually emerged, bearing a Rainbow-Loom-manufactured rope that measured somewhere in the vicinity of 100 feet! Well, I might be exaggerating, but it took a lot

Carter and Noah threw the football back and forth somewhere around 1000 times.

Carter and Noah threw the football back and forth somewhere around 1000 times.

of little plastic rings to make that rope. The boys mostly tossed the football and the colored bead necklaces, many of which ended up in Bec’s tree. We thought they might remain there until next Mardi Gras, but we were able to get them down. Well, to be honest, it was Kacy’s husband David, who TOWERS over the Gloors (not hard to do), who got them down so Bec’s homeowners association didn’t have to get involved.

So, as my title indicates, “Let the good times roll!”

King’s Cake, adapted from Mix and Match Mama’s 100 Bundt Cakes, # 99 Rainbow Cake

King's Cake

Ingredients

1 box of white cake mix

2 small boxes of instant vanilla pudding

½ c. vegetable oil

1-1/4 c. water

4 eggs

Purple, yellow, and green food coloring

1 can vanilla frosting

Purple, yellow, and green sprinkles

Process

Preheat oven to 350 degrees

Grease a 10-in bundt pan.

In a mixing bowl, combine cake mix, puddings, oil, water, and eggs with electric mixer. Separate your batter between 3 bowls, making sure that the bowls decrease in amount of batter as you down (so bowl #1 should have the most batter, bowl #2 a little less, bowl #3 the least.

Using your food coloring, make each bowl a different color. Stir well, making sure to incorporate the color throughout the batter.

Taking bowl #1 (the bowl that has the most batter in it), spread that evenly across the bottom of your prepared bundt pan.  Then take bowl #2 and spread the batter across the top of the first layer. Repeat with bowl #3.

DON’T SWIRL THEM TOGETHER. YOU WANT THE COLORS TO BE SEPARATE.

Bake 40-45 minutes or until toothpick inserted comes out clean.

Let cake rest on counter in pan for 10 minutes. Then invert cake onto serving plate to finish cooling. Frost cooled cake with your vanilla frosting and top with sprinkles.

Nana’s Notes: As I said, the recipe is adapted from a slightly different cake that used more colors. Also, as I mentioned, traditionally a King’s Cake has a plastic baby in the batter to be baked into the cake. It’s a fun tradition as long as you don’t have 11 children, all of whom want the piece with the plastic baby, resulting in fist fights. And, by the way, we have decided Mardi Gras is a wonderful excuse for a party.

Kids Whimsical Cooking: Chocolate Peanut Butter Cup Cookies

Addie cookiesHello everyone. Its been a while. I’ve got a new and exciting recipe for you all… peanut butter cookie bowls filled with mini Reese’s peanut butter cups. These  small little snacks both look and taste delicious. I would use them for party desserts. I hope you get a chance to make these irresistible treats. – Addie

Chocolate Peanut Butter Cup Cookies, courtesy Ree Drummond, Food Network

Cookies

Ingredients

One 16.5-oz. package refrigerated peanut butter cookie dough

1 bag of 24 miniature chocolate peanut butter cups

Special equipment: mini muffin pan

Process

Preheat the oven to 350 degrees.

Slice the cookie dough into 1-in thick slices, then into quarters. Place one quarter into each cup of a greased mini muffin pan. Bake for 9 to 11 minutes.

While the dough is still warm, push a peanut butter cup into each muffincup and let cool in the pan.

When the cookies are cool, use a spoon to remove them.

L-R: Alastair's friend Tate, Alastair, Magnolia, Dagny, Addie, Addie's friend Fiona, all helped make the delicious cookies.

L-R: Alastair’s friend Tate, Alastair, Magnolia, Dagny, Addie, Addie’s friend Fiona, all helped make the delicious cookies.

Nana’s Notes: I watched The Pioneer Woman program on Food Network when Ree Drummond made these delicious cookies. She said she has made them using peanut butter cookie dough from scratch, and her family doesn’t like them as well. These cookies can be made using any kind of cookie dough paired with any kind of small candy, i.e. sugar cookie dough with chocolate kisses or chocolate chip cookie dough with Rolos, and so forth. Also, on her Pioneer Woman web site, she suggests you not bake them the full 9 minutes, but instead pull them out just as soon as they begin to brown, about 6 or 7 minutes, and immediately insert the candy. Let them cool in the muffin pan. The candy turns soft and gooey. Yum.

Orange You Glad You’re a Bronco Fan?

I had grand plans to blog about my experience making tamales last week, but that must wait because I’m still on Cloud 9 about the Bronco victory! I have a happy victory hangover and can only think about orange and blue today.

Maggie and Bec came over to watch the game with us and I served my orange and blue food. I made my nephew Christopher’s salsa (See my blog post “Hot Stuff” in October for recipe) and served it with orange Dorito Nacho Chips and blue tortilla chips. Very festive. Slices of orange pepper and baby carrots offered a healthy choice. Our Blue Margaritas were delicious as well.

Just a quick word about my orange and blue dessert – Blue Velvet Cupcakes with Orange frosting. They were scrumptious, no doubt about it. They are basically the traditional red velvet cake, but you color it blue instead of red. It is difficult to find food coloring these days in the traditional primary colors. Grocery stores only offered pastel colors, and only in gels. I was able to find royal blue, violet, and orange at Hobby Lobby in the cake decorating section, also gels.

Well, anyone who has worked with royal blue food coloring gel knows – as I learned – the blue color is insidious. It was everywhere – on my hands, on my feet (??????) all over the countertops, in my sink, on my cabinets. It seriously looked like I had sprinkled blue food coloring gel like a priest sprinkles the congregation with holy water. I’m sure I will find it for days to come. Orange seemed less messy (or maybe it just blended).

I will have to come up with a dessert alternative for my big Super Bowl party (to which you are all invited).

Except, what if it was those cupcakes that made the Broncos win? Hmmmmmm. I might have to give one up for the team.

Here is the recipe for Blue Velvet Cupcakes, from bakefrostrepeat.com (she credits Sprinkle Bakes and One Particular Kitchen)

Blue Velvet Cupcakes

Ingredients
2 c. sugar
2 sticks butter, room temperature
2 eggs
1 T. cocoa powder
1 T. royal blue gel food coloring
1 small dab violet gel food coloring
2-1/2 c. cake flour
1 t. salt
1 c. buttermilk
1 t. vanilla
½ t. baking soda
1 T. vinegar

Frosting
4 oz. cream cheese, softened
¼ c. butter, softened
1 7-oz. jar marshmallow cream
2 c. powdered sugar
1 t. vanilla

Process
Preheat oven to 350 degrees. Prepare cupcake pans with paper liners.

In a mixing bowl, cream the sugar and butter, mix until light and fluffy. Add the eggs one at a time, and mix well after each addition. Mix cocoa and food colorings together to form a paste, and then add to sugar mixture; mix well. Sift together flour and salt. Add flour mixture to the creamed mixture alternately with buttermilk. Blend in vanilla. In a small bowl, combine baking soda and vinegar and add to mixture.

Pour batter into cupcake papers. Bake for 25 – 30 minutes, or until a toothpick inserted into the center comes out clean. Remove from oven and cool completely before frosting.

Frosting: Combine ingredients and spread on cupcakes.

Nana’s Notes: The cupcakes are dense, not fluffy, just as is a red velvet cake. Next time I will make my frosting a darker orange! By the way, the cupcakes turn your tongue blue. It goes away. Insidious. What can I say?

Birthday Hangover

So, it’s December 18. My birthday is over. My sister flew back to AZ yesterday. The house is very quiet with just Bill and me wordlessly falling back into our uneventful routines. This morning I put the three coffee cups that I hadn’t even gotten around to removing from our kitchen table after yesterday morning’s coffee into the dishwasher, thinking, well, today we only need two cups.

And then I told myself, “Get a grip. You’ll see her again in a week-and-a-half.”

I’m always sad to see visiting family leave. But the world is really small these days. I remind myself of the days when I would visit my sister when she lived in Washington D.C. and we didn’t have email, cell phones, or social media. I would know I probably wouldn’t see her for months and months. Now I talk to her almost every day, sometimes a couple of times. We can talk face-to-face via Facetime. I see pictures of her kids and grandkids on Facebook.

Having a December birthday always sort of split up the holiday season for me. Granted, as I have grown older, my birthday has been less of an event. This year, of course, was an exception. When I was younger, people often asked me if I hated having a December birthday. I would always tell them that I loved having a birthday in mid-December as a child because people would be out buying Christmas presents and would buy me a little something extra for my birthday. My brother David’s birthday is a bit different. His birthday is December 28, and his birthday was always a letdown. People were exhausted from Christmas shopping and celebrating and barely remembered his special day. Once Mom even forgot to make him a birthday cake and, in its place, brought home from the bakery a cake that someone hadn’t remembered to pick up. It said Happy Birthday Frank from Friends. Poor David.

As a random and meaningless side note, I distinctly remember my two favorite birthday gifts of all time. The first: My Aunt Cork, who was also my godmother, always got me a birthday present, and it was invariably something fun. When I was probably 6 or 7, she got me a set of three plastic wigs – blonde, brunette, and auburn. No artificial fiber; just a molded piece of plastic that you placed on your head. Oh. My. Goodness. Did I ever love those wigs! I was the happiest child alive. Now they are in some landfill somewhere, where they will never break down.

Second: After my divorce, I bought a small house in an old, established Denver neighborhood in which my son and I lived for four or five years. They were very happy years. We loved that house. Anyhoo, it sat on an alley, and had a garage right by the alleyway, unattached to the house. We would drive up to the door of the garage and my son would get out and manually open the door for me to drive in. One year, when Bill and I were dating, I was out of town on business sometime near my birthday. He picked me up at the airport and brought me home to my little house. As we pulled up to the garage, to my surprise, the door began to open. While I was gone, Bill had installed an automatic door opener. I was in seventh heaven, and so was my son.

Now that the house is quiet and the birthday festivities are over, we can move towards Christmas celebrations. For us, they begin tonight as we will celebrate Christmas with our son and daughter-in-law and the grandkids who will be leaving Friday for Mexico where they will spend a week with her mother and sister. Christmas with palm trees. Now that doesn’t stink.

And now…..

Unbaked Peanut Butter Cookies, via Bec B., via her mother-in-law

Ingredients
1/2 c. sugar
1/2 c. corn syrup, light or dark
3/4 c creamy peanut butter
1 t. vanilla
2 c. Special K cereal

Process
Bring sugar and corn syrup to hard rolling boil. Then add peanut butter, vanilla, and cereal. Roll them into balls and let harden.

Bec’s notes: I used 2 c. Rice Crispies and added 1/2 C almonds. We think they taste like a salted nut roll. Make a double batch; they’ll go fast. On the back of the card it says: Remember it is a hard rolling boil, not a hard boil stage.

Birthday Festivities, Part II

My sister and daughter-in-law gave considerable thought to just what my 60th birthday party should look like. Jen said she knew she wanted something interactive. They considered a pottery painting party. She said (and I think she was serious) they even spent a few minutes discussing ziplining. Thank you God for that being a short-lived consideration.

The driving force in their decision-making is that they knew that what would make me happiest is if the grandkids could be involved in a major way. My daughter-in-law’s sister told her she had used Mark and Susan and their cooking lessons for a team-building day for her staff to great success. Pasta-making was involved. Kids can make pasta. Voila!

I am sorry to say that I don’t know much about Mark and Susan (except that they are excellent chefs). My suspicion, however, is that they spend most of their time working with groups exactly as described above – in team-building exercises or holiday functions for adults. I would guess they don’t often work with children – much less six children between the ages of 3 and 10. They were amazing. I can’t emphasize that enough. They never got impatient. They stayed calm as flour was flying. They didn’t appear to get worried when a 5-year-old was seasoning the meat. And they got every single child involved in a way that was fun for everyone.

The first task they undertook was the meatballs. Susan brought over the ground meat, eggs, cheese, breadcrumbs and seasonings to the table.

She gave each of the smaller kids an egg, and allowed them to crack their egg into the meat mixture (after which she spent a bit of time removing eggshells!). Then each child put in a handful of cheese. Finally Susan passed around the pepper shaker, allowing each child to grind a bit of pepper into the mix. The meatballs were mostly made by the smaller kids, with Addie helping with supervision.

But the real fun came a bit later in the evening, after all of the sauces were almost finished. The kids were called to the table to make the pasta. There were two Kitchen Aid mixers with pasta-makers attached. If you have ever made fresh pasta, you know that you roll out the pasta, sprinkle it with flour, make the rolling mechanism one click thinner, and continue in this manner until your dough is nearly transparent. Then you cut the pasta in the shape you desire.

Addie’s job was to roll the pasta. She would lay a piece of rolled pasta onto the table. Dagny, Magnolia and Kaiya added flour. (Mylee was happily playing downstairs by herself where she apparently realized at long last she wouldn’t have to fight bigger kids for the toys she wanted. In her mind, her work was done with the meatballs!)

I can’t even begin to describe the amount of flour that was coursing through the air, onto the table, under the table, and into the pasta at the hands of a 7-year-old, and two 5-year-olds. There were literally mounds of flour on the table, of which they would take handfuls and begin rubbing it into the pasta (and onto their faces and clothes in the process). Mark assured us that you really couldn’t have too much flour, and that was a very good thing. Flour everywhere.

Once a piece of dough was thin enough, Addie would hand it to 8-year-old Alastair, who did the cutting. He was masterful at it. He really did figure out how to carefully hold the cut pasta and lay it carefully in a mound on the table sprinkled with flour (not that it needed a lot more flour).

It was quite an assembly line, and the pasta turned out delicious.

I have watched my grandkids in school performances. I have attended dance recitals and piano recitals. I’m always happy to be there and proud of them. But I don’t think I will ever enjoy watching them more than Saturday night as I watched them prepare the meatballs and the pasta for my birthday dinner.

And now…..

Last week I gave you my recipe for caramel corn. My daughter-in-law sent me this recipe for the caramel corn she makes every year. It is, my friends, infinitely better. It is from orangette.blogspot.com.

Caramel Corn, via Lauren H.

Ingredients
1 (3½-ounce) package plain (unbuttered natural flavor) microwave popcorn, or about 10 cups fresh popcorn popped by any method, lightly salted
1 cup packed light brown sugar
¼ cup light corn syrup
6 Tbsp. unsalted butter, melted
¼ tsp. salt
½ tsp. baking soda
2 tsp. vanilla extract
1 cup lightly salted peanuts, roughly chopped

Process
Preheat the oven to 250°F. Line a rimmed baking sheet with parchment paper.

If using microwave popcorn, pop the popcorn according to the package instructions. Coat a large mixing bowl with nonstick cooking spray, and dump the popcorn into the bowl, taking care to pick out and discard any unpopped kernels.

In a medium saucepan, whisk together the brown sugar, corn syrup, butter, salt, and 2 tablespoons of water. Bring to a simmer over medium-high heat. Continue to simmer, whisking often, until the mixture reads 250°F on a candy thermometer, about 3 to 4 minutes. Immediately remove the pan from the heat, and whisk in the baking soda and vanilla. Quickly pour the hot caramel over the popcorn. Use a rubber spatula to gently fold the caramel into the popcorn, taking care to distribute it as evenly as you can. Stir in the peanuts, and transfer the mixture to the prepared baking sheet. Bake for 1 hour, stirring and turning the popcorn with a spatula every 20 minutes. Remove from the oven, and place on a cooling rack for 20 minutes. Gently break up the popcorn, and serve.

Store in an airtight container for up to 5 days (or thereabouts).

Yield: about 10 cups

Nana’s Note: I didn’t use a candy thermometer because the boiling temperature at high altitude is different than at sea level and I didn’t have time to figure out the difference. So the candy thermometer would have been useless. So I just boiled the sugar mixture for 4 minutes as my other caramel corn recipe proscribes. Also, I didn’t happen to have peanuts on hand, but that would be a delicious addition — the salty and sweet would be yummy.

Birthday Festivities, Part I

My birthday has come and gone, and my celebration is certainly one I will never forget.

The party planners (mostly my sister Jen and my daughter-in-law Jll, with suggestions, advice, and help from others) know me well. They know that they didn’t need to plan a party at a fancy restaurant. They know that I wasn’t looking for a cocktail party with friends I haven’t seen for ages bringing me gifts I don’t need. But mostly they know that if I’m going to celebrate anything, it had better be with my family and there better be a role for my grandkids. And there had better be food!

I knew something was up. The kids have been giggling and whispering for a couple of weeks now. I had no idea what to expect. And even if I had given it a lot of thought, I would not have predicted what actually transpired.

When I entered the kitchen I was introduced to Mark and Susan who were going to be my personal chefs and cooking teachers for the evening! And the cuisine was my very favorite – Italian. Over the next couple of days, I am going to tell you what my evening was like.

After I realized what was happening and had a glass of wine placed in my hand and a birthday tiara placed on my head, I saw that Susan had begun making the appetizers. She had already prepared an amazing chicken liver pate. Delicious. Susan didn’t give me the specific recipe, but she noted it – and lots of the things they would be cooking and teaching us to cook – would include cream and butter. Get used to it, she pretty much said. Oh, I could easily get used to it.

To go with the pate, Mark grilled French bread that had been brushed with olive oil, giving it a delicious smoky flavor. It was perfect. He brought in a tray of bread that I thought we would never eat, but of course we did.

At the same time, Susan was preparing skewers on which she placed a grape tomato, a fresh basil leaf, and a piece of fresh mozzarella, and then drizzled with balsamic vinaigrette. The colors of the Italian flag, she pointed out. They were delicious, especially if you put all three pieces in your mouth at once and tasted the explosion of flavor. Mylee was a bit more selective, however. She probably ate seven or eight of them, but she would bite off the mozzarella cheese and hand the rest of the skewer to me. A symbiotic relationship.

Mark and Susan made three types of sauce for the pasta which would be made later. They made a fresh marinara sauce, which started with a gigantic bowl of a variety of fresh tomatoes. A mixture of tomatoes gives a more complex flavor, Mark explained to me. He cooked the tomatoes for probably an hour, along with onions that he had cooked slowly until they were as sweet as candy. As the tomatoes cooked, you could see them soften and condense. In the end, Susan used a hand blender to puree the soft tomatoes that he had cooked with the onions.

The second sauce was a meat sauce that consisted of a mixture of hot and mild Italian sausage, seasonings, and finished off with fresh red, green, and yellow peppers that had been cooked separately in olive oil to preserve some crispness.

Finally, they made an alfredo sauce with a very different twist. Instead of using butter, Mark used bacon. I was somewhat doubtful, being sort of an alfredo purist. Wow. It was amazing. And really, why should I have doubted? Parmagiano Reggiano cheese, cream, and bacon in one dish? What could go wrong with that?

All of these sauces were served over homemade pasta, which I will tell you about tomorrow. That memory will stay with me the rest of my life.

To conclude our meal, we had a wonderful desserts. Susan fixed the kids special ice cream sundaes, which included the long, thin, cookies filled with chocolate. Those cookies were a hit with the kids. At one point Dagny was just walking around eating the cookies right out of the box.

The adults were given an adult dessert of tiramisu, heavily flavored with coffee liquor. It was light and delicious. And beautiful, as you can see.

My sister had asked me some time ago to pick out a cake from Mixandmatchmama’s list of 100 bundt cakes. I picked hummingbird cake, which is a southern favorite that includes bananas, pineapple, and pecans, and is frosted in a cream cheese frosting. It was awesome, and looked terribly festive with my 6 and 0 candles.

You know, I have been complaining about turning 60, and that is silly. I am so blessed with my family and friends, and with good health. I have a wonderful husband I’m crazy about, three siblings who are my very best friends, daughters-in-law who are so kind and loving to me, and nine grandchildren (going on 10) who make me laugh every day.

Wait until you see the pictures and stories I will post tomorrow of the kids making the pasta. Don’t miss it.

And now…..

Peanut Butter Balls, via Jen S.

Ingredients
2 c. creamy peanut butter
1/2 c. butter
4 c. confectioners’ sugar
3 c. crisp rice cereal
2 c. semisweet chocolate chips

Process
Melt peanut butter and butter in saucepan, ovr low heat. In large bowl, mix crispy rice cereal and confectioners’ sugar well. Pour melted peanut butter and butter over cereal and sugar and blend together thoroughly.

Form into 1 inc. or smaller balls, spread on cookie sheets, chill until firm in refrigerator (overnight is okay).

Melt chocolate in double boiler and keep melted while working with balls. A teaspoon is best to use in dipping the balls in chocolate. Dip and place on cookie sheet. Keep chilled until firm.

All Booked Up

Tuesday night, I hosted my book club. It’s not a hard job. As host, you basically have three duties: 1) buy a bottle of red and a bottle of white and put out some wine glasses; 2) bake or buy some kind of dessert; and 3) provide a selection of four or five books on which the group will vote to read for the next meeting. I have been a member of this group since 1996 – almost 18 years – so I have hosted many times.

Yesterday I baked a batch of brownies and made a simple ganache frosting by heating up cream and pouring it over 8 oz. of chocolate chips to melt, then adding a teaspoon of instant coffee. Because I was feeling particularly festive and clever, I crunched up three or four candy canes and sprinkled them over the top of the brownies after I frosted them with the ganache, for some added Christmas spirit. Furthermore, I made a special trip to our neighborhood liquor store where I bought a nice red zin and a crisp pinot grigio. I cleaned the house and set up the room for our gathering at 7:30.

Bill and I were sitting down and eating a quick dinner at 6:45, when – and I don’t know why – it suddenly hit me that I hadn’t gotten any books on which the members could vote for next time. Generally, the host actually has the books on hand so that the members can peruse them prior to making their collective decision. I had nothing. I said a bad word.

Thank goodness that I keep a running list of books that I want to read. Our book club has two rules regarding the books: 1) (and aren’t I using a lot of numerated lists in this post?) the book must be available in paperback; and 2) the book selected must be a book that no one in the group has already read.

The problem with my list of books I want to read is that it includes hard cover books, and it also includes many mysteries (which I happen to love but the rest of the group doesn’t). In a matter of minutes, however, Bill had figured out the perfect answer: 1) (I can’t resist) go through my list, and upon finding a suitable book, find it on Amazon; 2) hit the “share” button and email it to him; and 3) he would do the rest.

I used my list, coupled with the section of Amazon that says “customers who bought this item also bought…”, and was able, in about 20 minutes, to come up with a list of six books. Bill worked his magic, and in 10 more minutes, he handed me six sheets of paper, each with a picture of a book and the synopsis. I had time to pour myself a glass of wine to calm down!

Our book club was founded in 1994, and we have seen many members come and go over the years. It is a awesome group of women of different ages and different backgrounds who all happen to love to read. Our conversations about the books are always interesting but never snooty or overly intellectual. Just intellectual enough! And we digress – a lot! I will, of course, be unable to attend for the next four months or so as I will be in AZ. But I will continue to read the books they select and maybe even – if I’m really ambitious – electronically provide my thoughts about the book, perhaps via Nanaswhimsies!

They, by the way, didn’t blink an eye when I handed them sheets of paper instead of books. Thanks friends.

In addition to my numerated lists, I also seem to be using a lot more exclamation points than usual. Too much coffee perhaps? And now that I’ve mentioned it, I’m not going to change them!

Yesterday morning I made my annual holiday batch of caramel corn. Who doesn’t like caramel corn? I can tell you that I brought a batch in a tin to my son with whom I ate lunch, and he was very happy. I even snuck in a leftover brownie from last night. The recipe is simple and delicious.

Caramel Corn

Ingredients
1 c. butter
2 c. brown sugar
½ c. corn syrup
1 t. salt
½ t. soda
1 t. vanilla
5 quarts popped popcorn

Process
Preheat oven to 250 and place popped corn on tray(s) in oven to keep warm.

In medium saucepan over medium heat, melt butter. Stir in brown sugar, corn syrup, and salt. Bring to a boil, stirring constantly. Then boil without stirring 4 minutes. Remove from heat and add baking soda and vanilla. Pour in then stream over corn; stir to coat.

Bake in preheated oven, stirring every 15 minutes, for 1 hour. Remove from oven; let cool completely before breaking into pieces.

Nana’s Notes: Every year, including this year, I use too much popcorn. The result is the corn isn’t as thickly coated as I would like. Use less. Pretend I said 4 quarts of popped corn.

And now……

Cream Cheese Kolacky Cookie, via Margaret M.

Ingredients
3 oz. cream cheese
1/2 cup butter, softened
1 cup all-purpose flour
1 tsp. vanilla (lemon or orange are nice also, depending on what filling you use)
1/2 cup filling (jam or pie filling)
1/4 – 1/2 cup confectioners’ sugar

Process
Mix the cream cheese and butter until smooth. Add vanilla. Add the flour slowly until well blended. Shape into a log and chill overnight or for several hours.

Preheat oven to 350 degrees. Roll the log in the powdered sugar. Slice off 1/8 in thick slices and place about 1/2 tsp filling in the middle of the cookie. Fold ends of cookie over the jam. (The original recipe calls for rolling out the dough and cutting 2-1/2 inch squares then overlapping opposite corners. The modification is just easier when we are doing this with kids, and we don’t handle the dough as much, so it’s flakier). Place on ungreased cookie sheets and bake for 10-12 minutes in the preheated oven. If desired, sprinkle lightly with powdered sugar after cooling.

Source (before modifications) : Allrecipes

Makes about 3 dozen.

Nana’s Notes: Thanks for the great recipe. I rolled the dough out and used a biscuit cutter to cut circles. I placed about a half tsp of blueberry or apricot peach preserves in the center and folded the cookie over. I didn’t have a lot of success getting them to stick. But, while they aren’t lovely, they are definitely delicious. I should have rolled them thinner and used egg to seal.

Anyone else have a recipe they want to share? Comment or send an email to the address on top right.