Cooking Teachers

I’m not sure I can entirely remember what life was like prior to Food Network. This fact, of course, isn’t exactly surprising since I can’t remember where I park my car at the mall. The irony I’m afraid is that I CAN remember my home telephone number from when I was a 6 years old and the words to all of the songs from the 1960s. Sigh. Way to waste those important brain cells.

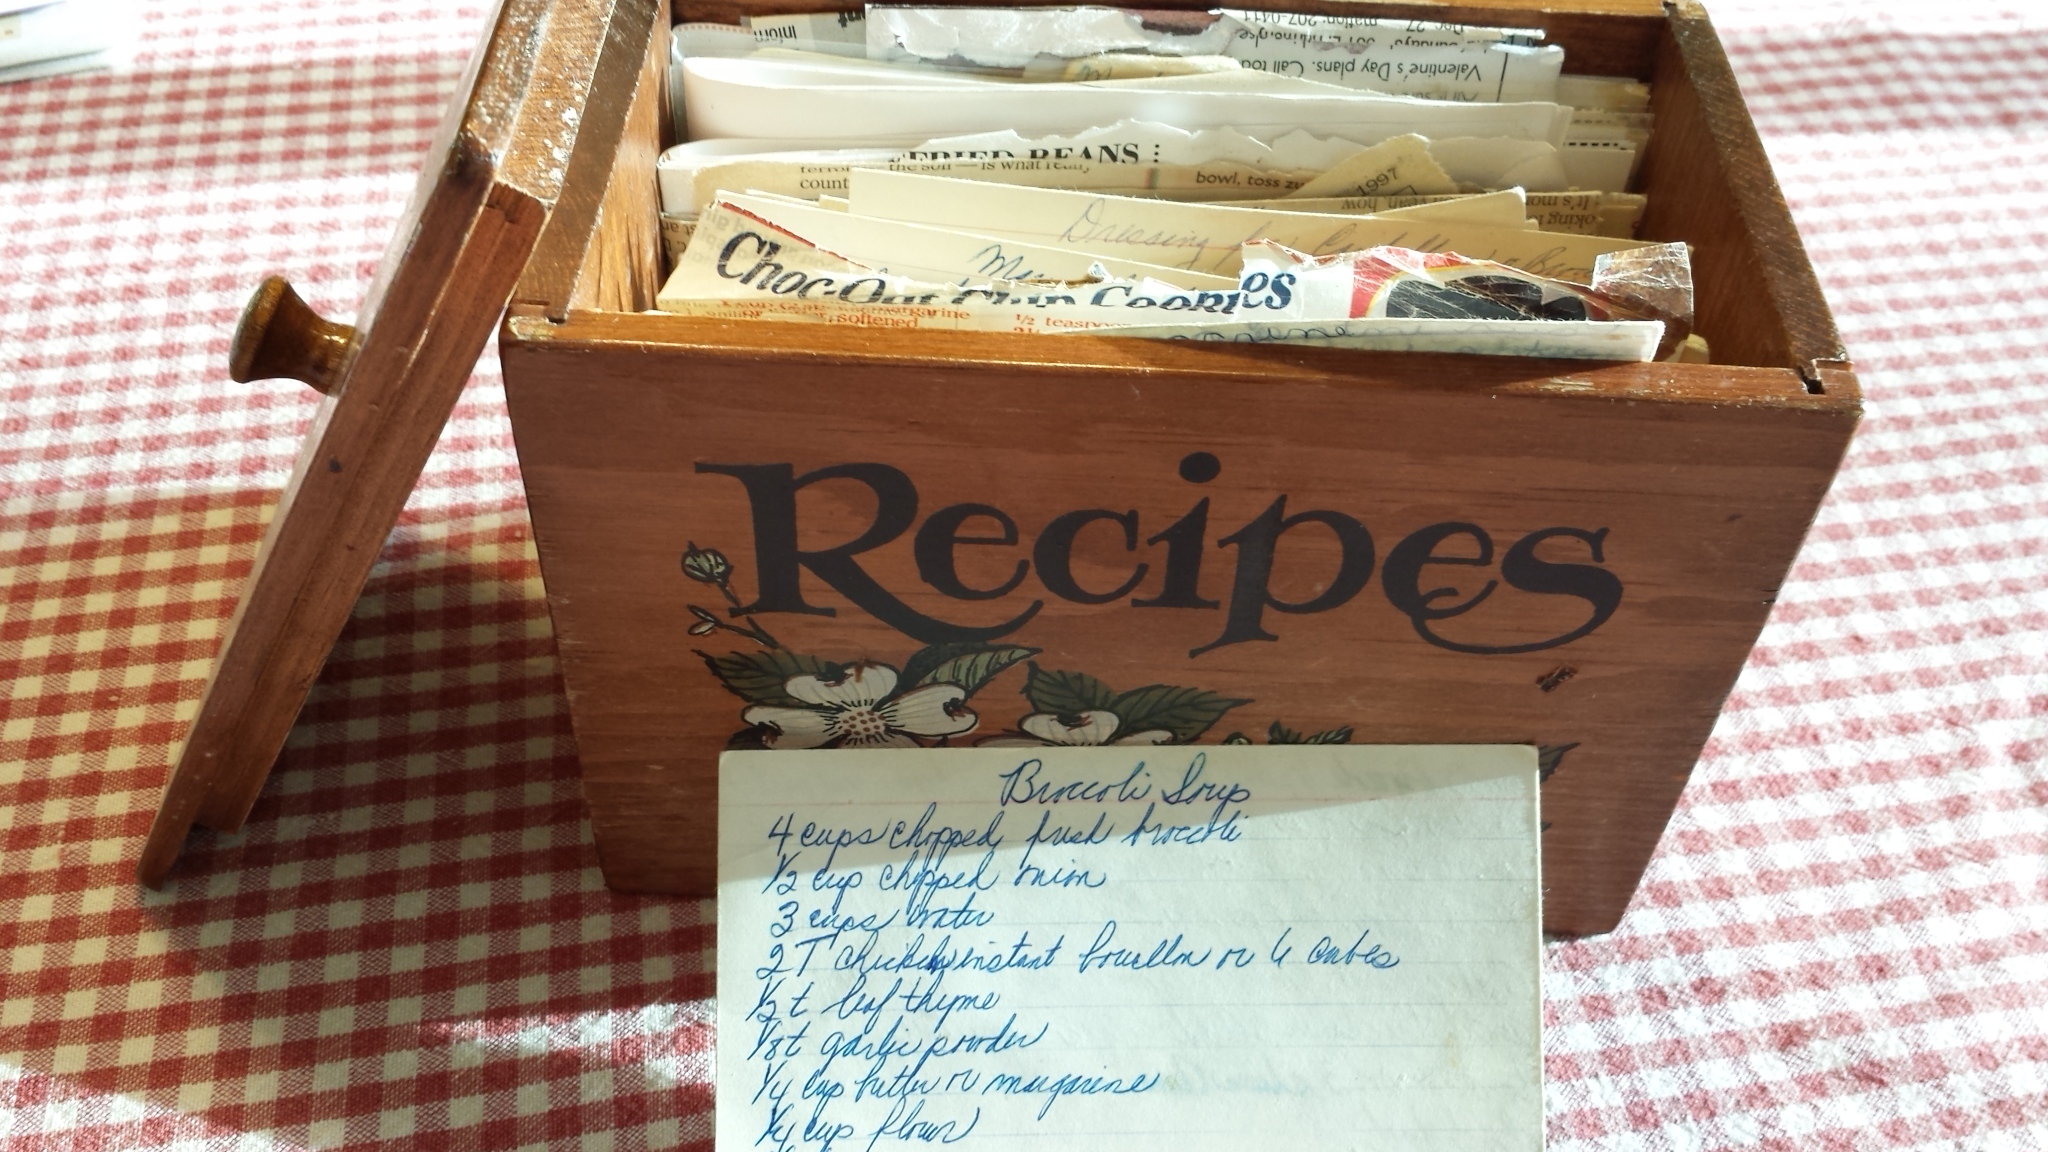
I guess our parents used those funny things called cookbooks. They didn’t have anyone to teach them to cook from their little black and white television sets. Well, except for Julia Child. And I don’t know about anyone else’s mom, but my mom didn’t particularly want to learn to cook French food. I would have liked to seen the look on my dad’s face should mom have plopped sole meuniere in front of him one night.

My mom says she learned to cook from my paternal grandmother (her mother died at a very young age). I learned to cook by watching my mother. And more recently from watching Food Network and PBS cooking shows.

It used to be that Food Network consisted almost entirely of actual cooking shows. Nowadays, you can find a few cooking shows on during the day, but nighttime consists entirely of competition shows. They don’t particularly interest me. So I mostly watch during the day. Ree Drummond, Trisha Yearwood, Ina Garten, Giada De Laurentiis. Others.

If I’m to tell you the entire truth, most of the stars of the shows drive me crazy. I can’t imagine cooking showing as much cleavage as does Giada, if for no other reason than that I would undoubtedly splash my chest with hot bacon grease. I sometimes think that if Ina Garten says “How (fill in the blank) is that?” one more time, I will throw my coveted seasoned cast iron skillet through the television screen.

But I have learned things from all of these Food Network and PBS cooks that I think has made me a better cook. Here’s a few of the things I have learned…..

Ina Garten: As annoyed as I get when the Barefoot Contessa instructs us to use “really good wine” or “good vanilla” or, as in one recipe, “really good saffron” (as if you should spend even more on an ingredient that already requires you to pawn your wedding ring to buy), I have learned that she is right that the better the ingredients, the better the final result. But the way I look at it, it doesn’t mean you have to fly to Madagascar to pick up a bottle of vanilla. It means, if possible, buy real vanilla extract as opposed to vanilla flavoring.

Paula Deen: Paula’s use of butter is (and I think was meant to be) ridiculous. But she taught me not to be afraid to use butter in my recipes. It simply tastes better. I also learned the easiest way to prepare collard greens – fold them in half and pull the leaves off the stem in one fell swoop.

Giada De Laurentiis: Despite my constant annoyance with her cleavage and the fact that she won’t simply say “spaghetti” or “fettucine” the way we do, she has taught me to use the freshest ingredients possible. Recently, she made a pasta red sauce that looked delicious, and she threw the rind of a piece of Parmigiano Reggiano into the sauce to flavor it. I will definitely give that a try. Giada also uses a lot of fresh fennel, and once I gave it a try when using one of her salad recipes that included fennel and grapefruit, I was hooked. Yum.

Ree Drummond: The Pioneer Woman has given me permission to use store-bought ingredients. Though Ina Garten must turn her nose up at Ree Drummond, I love that Ree will open up a box of chicken broth or use a jar of store-bought pesto.  If she can do it, so can I! It makes me happy to see her use her cast iron skillet so often because it’s one of my favorite cooking utensils. I couldn’t live without it. I love her 16-minute meals. Next to Lidia, I probably use more of the Pioneer Woman’s recipes than any other.

Lidia Bastianich: I left Lidia until last because, well, you know. I want her to adopt me. She speaks to me. For example, the day after I burned my hand because I grabbed the handle of a pan that I had taken out of the oven a minute or so before, she told me, “Kris, make sure when you take something out of the oven, you place a towel on it to remind yourself and others that it is hot.” (Well, she might not have directed it specifically to me, but she said it on her show the next day, and I know she meant it for me.) She has taught me not to fear anchovies but to embrace them as a rich and salty seasoning that melts in your fry pan and therefore won’t scare others, who will simply wonder why your sauce is so good. I also learned to salt my food as I cook, every time I add an ingredient or move to a new step. (If you fear oversalting, place the amount of salt you want to use in a little bowl and take from that. That’s what Lidia told me.) And maybe my favorite instruction from her is, “Clean hands are your best kitchen tool.” Amen.

I’ll leave you with one of my favorite Lidia recipes…..

Pasta with Baked Cherry Tomatoes, courtesy Lidia Cooks from the Heart of Italy, Lidia Bastianich

Ingredients
3 pints cherry tomatoes, halved
½ c. plus 1 T extra-virgin olive oil
1/3 c. fine dry bread crumbs
1 t. kosher salt, plus more for the pasta pot
¼ t. pepperoncino flakes, or to taste
1 lb. spaghetti, gemelli, or penne
10 plump garlic cloves, peeled and sliced
1 T. chopped fresh Italian parsley
1 c. loosely packed fresh basil leaves, shredded
½ c. freshly grated pecorino (or half pecorino and half Grana Padano or Parmigiano-Reggiano) plus more for passing
4 oz. Ricotta or ricotta salata

Process
Arrange a rack in the center of the oven, and heat to 350 degrees.

Toss the cherry tomato halves in a large bowl with 3 T. olive oil. Sprinkle over tomatoes the bread crumbs, salt, and pepperoncino; toss well to coat the tomatoes evenly. Pour the tomatoes onto a parchment-lined sheet, and spread them apart in a single layer. Bake until the tomatoes are shriveled and lightly caramelized (but not dried out), about 25 minutes in all.

Meanwhile, fill a large pot with salted water, and heat to a rolling boil. When the tomatoes are nearly done, drop the pasta into the pot, stir, and return the water to a boil.

As soon as the pasta is cooking, pour the remaining olive oil into a big skillet, set it over medium-high heat, and scatter in the sliced garlic. Cook for a minute or two, until it is sizzling and lightly colored, then ladle in about 2 c. of the pasta cooking water, and bring to a vigorous boil, stirring up the garlic. Let half the water evaporate, then lower the heat, stir in the chopped parsley, and keep the sauce barely simmering.

As soon as the tomatoes are done, remove them from the oven.

When the pasta is al dente, lift it from the water, drain for a moment, and drop it into the skillet, still over low heat. Toss pasta quickly with the garlic-and-parsley sauce in the pan, then slide the baked tomatoes on top of the pasta. Scatter the basil shreds all over, and toss everything together well, until the pasta is evenly dressed and the tomatoes are distributed throughout. Turn off the heat, sprinkle on the grated cheese, and toss once more.

Serve immediately.

pasta with baked tomatoes

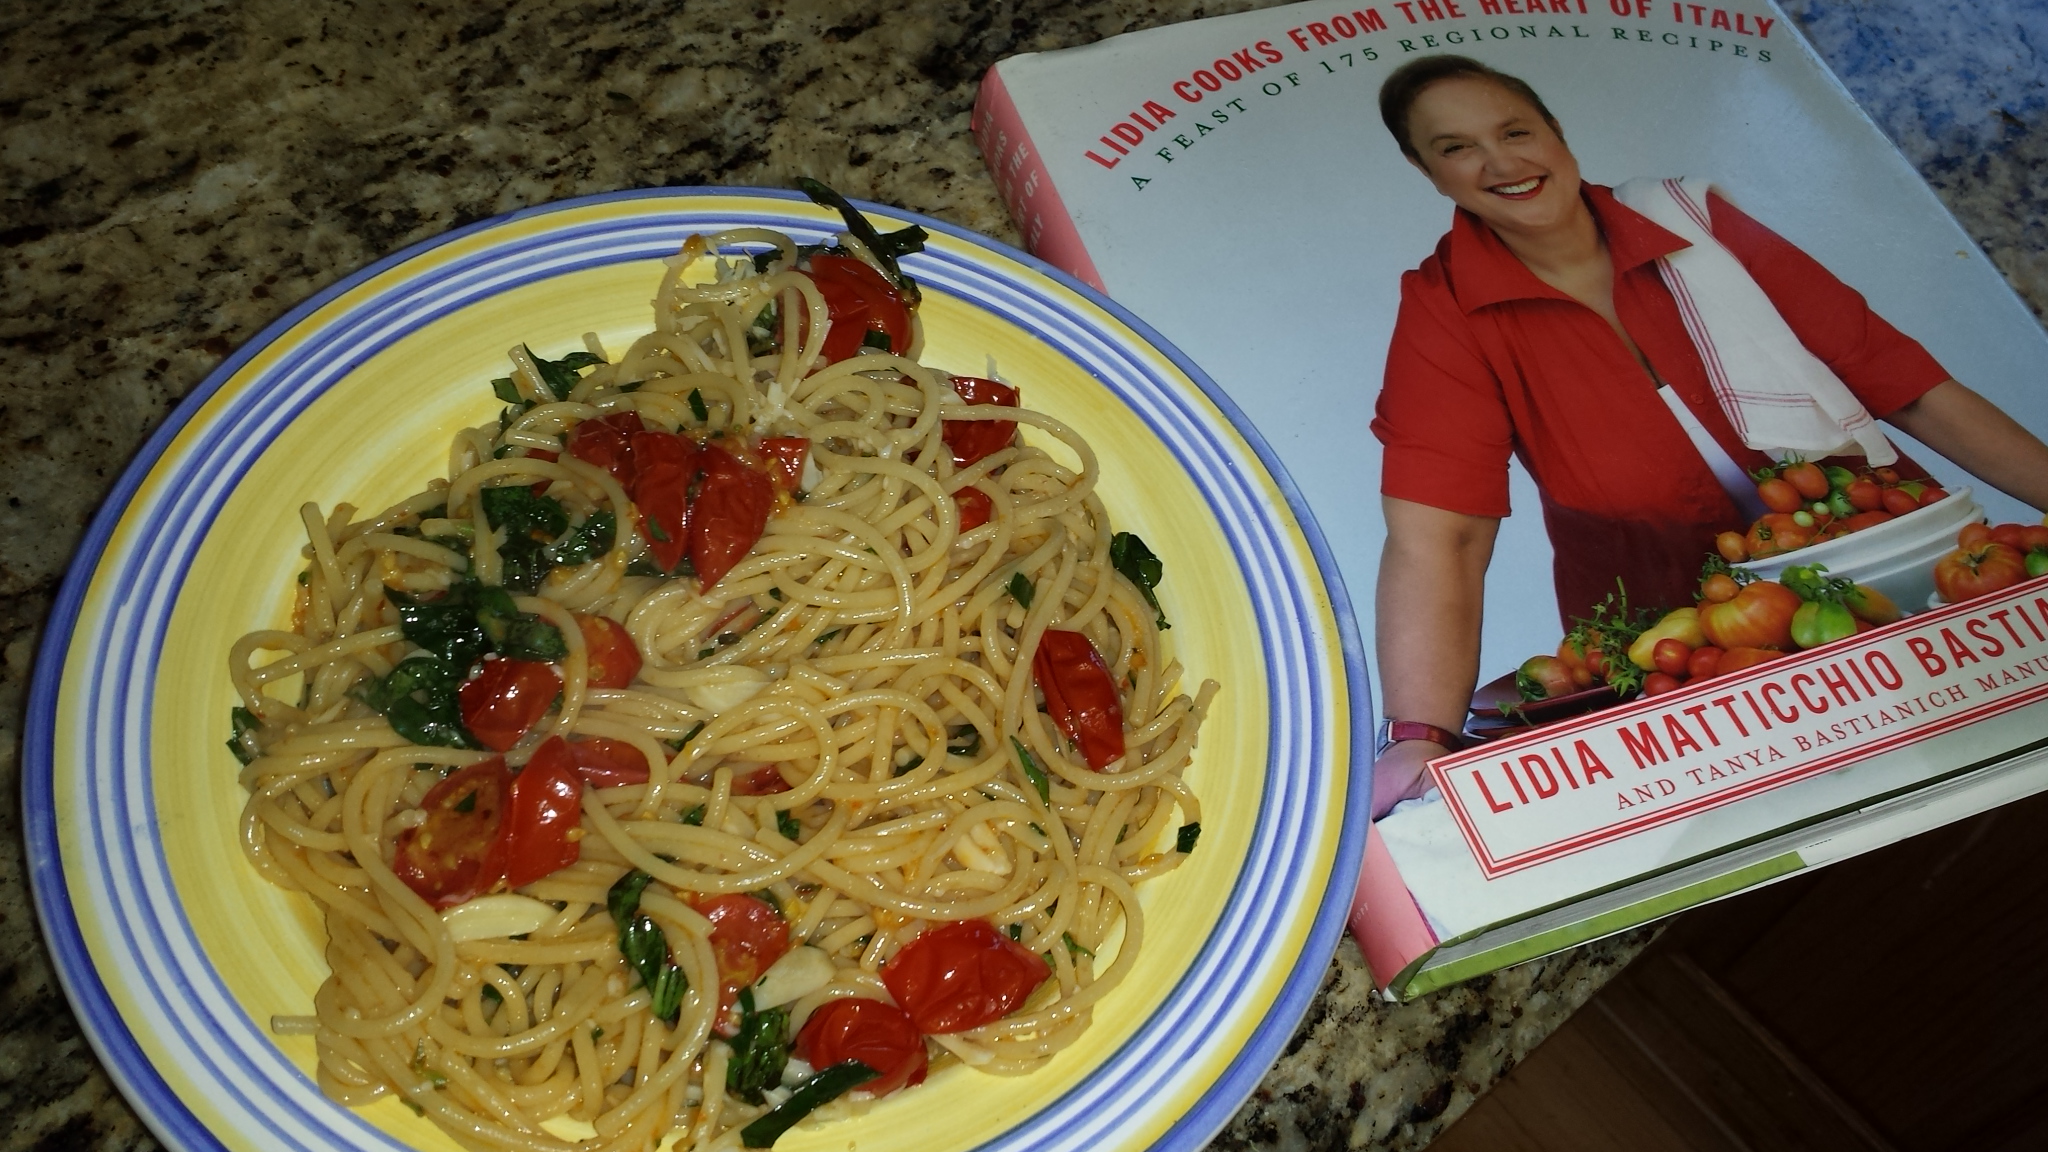
Nana’s Notes: I cut the recipe in half by simply halving the ingredients. I used fresh tomatoes out of my garden, which I’m madly harvesting. The only cheese I used was Parmigiano. The meal was delicious. Thanks again Lidia.

I Can Practically Taste It

My body — specifically, my belly — once again turned around and kicked me in the face. I spent the past four days in the hospital. More about that later. But I will tell you this much. As usual, I was NPO (which is some sort of fancy Latin for you can’t eat or drink a single, solitary thing). For four days I thought about my mom’s Cream of Broccoli Soup. So I thought this reprint of a former blog post (from October 6, 2014) might be in order. I only wish my mom was here to make it for me!

recipe boxThe other day I decided I needed to either use or toss some fresh broccoli that was in my refrigerator taking up a lot of space. (The reason it was taking up a lot of space was because I had spent way too much to buy the already-cut-up kind of broccoli in big plastic containers because for whatever reason, cutting up broccoli or cauliflower is as yucky a job as peeling potatoes or emptying the dishwasher.)

Fall is in the air, so it’s beginning to be soup season. I decided a pot of Cream of Broccoli soup was the answer!

I did as I usually do, firing up my IPad and Googling “Cream of Broccoli Soup.” Of course, many links to soup recipes magically appeared.  But suddenly it occurred to me that Mom had frequently made a delicious Cream of Broccoli soup when she was preparing soups for the coffee shop they inadvertently owned in Leadville. (I say inadvertently because the only reason they owned the coffee shop was that it was attached to the Leadville bakery they bought, and so they suddenly became restaurateurs as well as bakers. It never was anything they were too happy about, I can assure you.)

Anyhoo, I began going through her recipe box. That is not an easy task, my friends. It is literally stuffed with handwritten recipes and newspaper clippings of all sizes. After all of these years, the recipes are no longer in any kind of order. It took me some time, but as I literally got to the last few cards, there it was.

Broccoli Soup.

I looked at the recipe, written in her oh-so-familiar handwriting, and found it to be not all that different than the other recipes I had looked at that morning on my IPad. The main difference is that she used chicken bouillon cubes and water instead of chicken broth. I don’t think that was

Mylee is tearing up the cheese for the soup.

particularly uncommon back in the days when she was making her daily soup.

She listed the ingredients, and then wrote out the instructions. After detailing how to put the ingredients together to make the soup, she wrote, “I like to add 2 or 3 slices American cheese.”

Suddenly and unexpectedly, I began to cry. Serious crying, with tears rolling down my cheeks.

I probably think about my mother almost every day, mostly in passing. I will be doing my sheets and will think about how she changed bed linens every Wednesday. Or I might be getting ready for bed and I will think about how she took a bath every night and got in her pajamas before sitting down to watch TV with Dad.

But those thoughts never make me cry.

So I’m not sure why the recipe brought me to tears. Something about her adding that note about what she liked to do to enhance that recipe was simply so poignant.  It was like she was talking to me.

mylee eating soupAfter I had my cry, I started thinking about how glad I was to have many of her recipes in her handwriting. It made me begin to wonder if there was something I could do for my son that would be as meaningful. I’m not sure handwritten recipes would be the thing, but I’ll bet there is something. I’m going to have to ask him.

And for the record, Mom would never have purchased prepackaged and precut broccoli. But she wouldn’t judge me for doing so. And, in fact, I suspect she likely used frozen chopped broccoli, which worked just fine.

Also, despite the fact that it will take a trip to the grocery store, I plan on adding 2 or 3 slices of American cheese to my Broccoli Soup (that’s what she called it as opposed to Cream of Broccoli Soup.) If it was good enough for Mom, it’s good enough for me! The best part of it all was that Mylee helped me make the soup!

Do you use recipe cards? Do you use any of your mom’s recipes? Do you think I’m a big baby for crying?

Broccoli Soup

Ingredients
4 c. chopped fresh broccoli
½ c. chopped onion
3 c. water
2 T. instant chicken bouillon or 6 bouillon cubes
1/t. leaf thyme
1/8 t. garlic powder
¼ c. butter or margarine
¼ c. flour
1/8 t. pepper
2 c. half and half or milk

Process
Cook broccoli, onion, water, bouillon, thyme, and garlic powder. In blender or food processor – 1/3 at a time – blend until smooth. Melt margarine over moderate heat. Add flour and pepper. Cook a few minutes, stirring. Add cream. Cook over moderate heat, stirring, until thickened. Add broccoli mixture. Heat but don’t boil. I like to add 2 or 3 slices American cheese.

Nana’s Notes: Forgive me Mom, but I made a couple of changes. I cooked the onion in vegetable oil until softened, then added a clove of garlic, minced, and cooked that for a minute or so. I didn’t add the garlic powder. Instead of the chicken bouillon and water, I used 3 c. of chicken broth. Also, I used butter instead of margarine. But, of course, I added the slices of American cheese.


Not My Mom’s Cooking: Bring on the Limes

We are a family of grillers. All of my siblings cook frequently on the grill. In fact, during the summer, I’ll bet we mostly cook on a grill. What’s more, most of our children do the same. Whenever Court and his family are over for dinner, he takes over the grill and cooks the food. Yay!

It makes me happy that we are all grillers because we take after my dad. He manned the grill in the summer in Columbus when grilling wasn’t even a thing. And not a gas grill mind you. He lit coals and waited for them to begin turning to ash. He stood by the grill and watched his meat carefully so that it wouldn’t burn until it was ready to eat. He wasn’t empty-handed, of course. He had a beer or a martini in his hand as he cooked. Why not?

I have a gas grill, as does most everyone these days. They are quick and easy to use. I can light it up even in the cold weather, and frequently do. But I have to tell you that one of my favorite things to do is haul out my charcoal grill from the side of the house, light the coals, and wait for them to be ready with an ice cold martini in my hand. The perfect ending is a juicy ribeye steak.

My siblings might be able to correct me on this, but I don’t think Dad always cooked chicken on the grill. Steaks, yes. Burgers and hot dogs, definitely. Pork chops, undoubtedly.

But the reason I say this about chicken is because I remember when Dad started grilling chicken, and it was because of my cousin John, who came to visit from the small town of Valley, Nebraska, just outside Omaha. While John is my maternal cousin, he and Dad were good buddies. My mom was the youngest of 13 kids and John’s mom was the eldest, so the age difference between John and Dad wasn’t great.

John prepared chicken in the simplest way possible – salt, pepper, butter, maybe a bit of lemon juice, and a beer to douse the flames. Oh, and perhaps a bit would spill onto the meat. Oops. To this day, my brother will say that his favorite olfactory memory of Dad is the smell of beer on hot coals. It’s the only thing I ever use to keep a grill under control.

I’m telling this story because though Mom and Dad eventually began to cook chicken on the grill, I don’t think they ever did anything besides the lemon chicken and maybe chicken with barbecue sauce. I don’t think they went beyond those boundaries.

I, on the other hand, cook chicken on the grill many different ways. Chicken is still fairly inexpensive. It’s versatile. And it tastes good. Most people use chicken breasts, but for me, it’s chicken thighs every single time.

This is a recipe I came across recently because I discovered a multitude of limes in my refrigerator and wanted to use them up. I have a habit of buying limes just about any time I go to the grocery store because I can’t remember whether or not I have any in the refrigerator. So they add up because a person can only drink so many gin and tonics. I think my fear of running out of limes is left over from a couple of years ago when there was a lime crisis in Mexico (probably not the most serious crisis they face each day) that resulted in a shortage of limes, at least in Arizona. It is surprising how this impacted my life. I’m not sure what that says about me, but it probably isn’t good.

Anyhoo…..

Chili Lime Chicken
Adapted from rasamalaysia.com

Ingredients
2-2.5 lbs. skin-on bone-in chicken thighs
½ c. fresh lime juice
3 t. fresh lime zest
¼ c. olive oil
4 T. fresh cilantro, finely chopped
2 jalapenos, finely chopped
4 garlic cloves, finely chopped
1 T. honey
2 t. salt
1 large pinch of red pepper flakes, or to taste.

Process
Rinse the chicken thighs and pat dry with paper towels. Set aside.

Mix the remaining ingredients together in a big bowl, making the marinade. Add chicken to the marinade, making sure to stir and coat the chicken evenly. Marinate for 2 hours.

uncooked chicken

Prepare your grill, brushing a little bit of oil on the surface. Add a bit of the garlic, cilantro, and jalapeno from the marinade on top of the chicken and grill until they are golden brown and charred on both sides. Watch carefully, as the honey will burn easily.

Chili Lime Chicken

Nanas Notes: I think chicken is kind of difficult to cook on the grill because the fat in the skin causes flames. I cooked the thighs for 10 minutes on one side with the lid open, keeping a close eye on them. I then cooked the thighs for 10 minutes on the other side. I turned off one of the burners and cooked the chicken on indirect heat with the lid closed for 30 -35 minutes, until finished. With this particular recipe, it really is necessary to oil the grill grate prior to cooking. The honey in the marinade results in sticky chicken. If you don’t oil the grill, your crispy skin will stick to the grill and you will lose out on some good eats.

Not My Mom’s Cooking: Using My Mussels

For having grown up and lived in a relatively small community in central Nebraska for a lot of their lives, my parents were fairly sophisticated eaters. It’s true when we were growing up, Mom’s cooking was pretty typical meat-and-potatoes fare. That’s what Dad wanted, and he worked hard and was hungry by the end of the day. A cobb salad with grilled chicken would not have passed muster with Mr. Gloor. Roast beef and mashed potatoes were more to his liking.

But I think Mom stretched her cooking muscles once she and Dad were semi-retired and living in Dillon, Colorado. She had more time and probably there were more interesting food supplies available to her. Seafood, for example.

I mentioned before that I enjoy going through Mom’s old recipe box. A few things in that box have surprised me, but none more than the hand-written recipe for Coquilles St. Jacques – basically scallops with mushrooms in a gruyere cheese sauce. Yum. I, of course, never remember her setting a plate of Coquilles St. Jacques down before me in Columbus, Nebraska; however, Jen is positive that Mom actually made such a dish at one time or another. Not for me, but then Mom always did like her best.

Anyhoo, while good seafood wasn’t readily available in Columbus in the 1950s and 60s, Mom and Dad did like them some seafood later in their lives. Bring on the shrimp, the mussels, the oysters, the clams; you name it, they enjoyed it. Thankfully, they had a daughter who lived on the east coast and who frequently traveled with them to places like Florida where seafood was plentiful. Mom could order a huge dish of mussels and eat every single one.

But I don’t think she ever made mussels herself.

For the longest time, mussels intimidated me. There was always all that talk about the beard of the mussel. It seemed so scary. That, and getting the sand out of the shells. I was afraid to tackle them. Plus the whole notion that they’re alive. Eeeeeewwwww.

But I did. And it couldn’t have been less terrifying or more easy. So I serve them a lot when I’m in the mood to entertain with something impressive and festive-looking, but easy. There are many delicious recipes, but mussels in white wine and garlic are my favorite, so that’s what I always make.

I tackle the so-called beard using a needle-nose pliers that you can get at any hardware store. My mussels almost always come from Whole Foods, and their fishmongers carefully sort them so that there are few with broken shells. The mussels are largely farm-raised, and I find most of them don’t even have a beard. (Wild mussels use their beard to attach themselves to rocks or bottoms of bridges. Farm-raised mussels sit in chaise lounges and soak up the sun!) But if they do, simply grab the beard with the pliers and gently pull it out.

Ina Garten suggests soaking the mussels in water into which you have tossed a handful of flour. According to her, the mussels open their shells to eat the flour and the sand is dislodged. I find that isn’t necessary in the way that it IS necessary for clams, which live in the sand. I simply rinse them and rinse them and rinse them again, and I have never had sandy mussels.

One thing to remember when cleaning mussels, however, is that you must take the time to look at each mussel. It must be closed, or close if you tap it on the counter, and the shell must not be broken. It’s a bit time consuming, but easy enough.

Two tidbits before I give you the recipe….

First, I knew a man from Connecticut. (Sounds kind of like There was a man from Nantucket…) He was with me once in a restaurant when I ordered mussels. He laughed, and said when he was growing up on the Atlantic shores of Connecticut, they considered mussels to be “garbage fish.” Mussels were apparently very plentiful and he would find them attached to anything along the shore. Including garbage cans. They would throw them away.

Second, when Bill and I were on our European adventure, as we traveled through the Province region of France, we ate mussels, mussels, and more mussels. The first time we ordered them was in Nice, and they were all-you-could-eat moule e frites (mussels and French fries). They brought us each a bucket of mussels the size of a small garbage can, and they were DELICIOUS. Nevertheless, we couldn’t eat more than one bucket apiece. After about my fifth or sixth time eating mussels in a café along the Mediterranean, I finally told Bill, “Well, that’s it. I cannot and will not eat another mussels for a long, long time.”

I got over it.

Don’t be afraid to give these a try.

mussel wine bread

Mussels in White Wine and Garlic
Adapted from Ina Garten, Food Network

Ingredients
6 lbs. mussels
3 T. butter
3 T. olive oil
1 c. chopped shallots
1-1/2 T minced garlic
1 c. diced tomatoes, drained
1/3 c. chopped Italian parsley
2 T. fresh thyme leaves
1-1/2 c. white wine
2 t. salt
1 t. freshly ground pepper

Process
Rinse the mussels very well, and allow them to soak in water for about 30 minutes. Drain the mussels, then remove any beard using your fingers or a needle-nosed pliers. Scrub the mussels if the shells are dirty. Discard any mussels whose shells aren’t tightly shut or with broken shells.

In a large non-aluminum stockpot, heat the butter and olive oil over medium heat. Add the shallots and cook for 5 minutes; add the garlic and cook for 3 minutes more, or until the shallots are translucent. Add the drained tomatoes, parsley, thyme, wine, salt, and pepper. Bring to a boil.

Add the mussels, stir well, then cover the pot and cook over medium heat for 8 to 10 minutes, until all the mussels are opened (discard any that do not open). With the lid on, shake the pot once or twice to be sure the mussels don’t burn on the bottom. Pour the mussels and the sauce into a large bowl and serve hot, with a baguette on the side for dunking.

Serves 4 or 5 adults

Nana’s Notes: The amount of mussels will vary according to the number of people you are serving and how much they will eat. When my grandson Alastair is eating my mussels, he can eat something in the neighborhood of 1-1/2 to 2 lbs. by himself! Adjust the other ingredients accordingly. The mussels look spectacular when they are poured into a big bowl. And taste just as good. But I like to serve them in individual bowls so that each person has their own juice in which to dip their bread. 

This post linked to the GRAND Social.

Hard Cookies

Back in 2000 (which will forever be in my mind as Y2K – the year the world was going to end and computers were going to blow up), my sister Jen and her daughter Maggie traveled with Bill and me to Italy. Bill and I had been before, and we were so excited to show off that country we loved so much to Jen and Maggie. We spent two weeks and had a BLAST.

At the time, Maggie was in her early 20s and absolutely gorgeous. (She’s still absolutely gorgeous, but no longer in her early 20s.) Her appearance gave us an advantage in many regards, not the least of which was getting into restaurants that were completely full. We would send Maggie in to see if there was room, and shockingly, they always found us a spot, at least if the spot-finder was male. One waiter was so taken with her that he actually had us take a picture of himself with her. Oh, to be young and beautiful.

Anyway, many years later when Maggie got married (but not to the waiter), at least in part because of her fond memories of her trip to Italy, she elected to have somewhat of an Italian theme for her wedding. As such, she decided to give an Italian theme to the treats she left in the hotel rooms for the out-of-town guests. I don’t remember what all she gave save for one thing. She included cellophane-wrapped packages of three biscotti.

You know, biscotti. Those hard quarter-moon-shaped cookies that Italians dip into their espresso. Or into their wine if they are so inclined. I’ve tried it. It’s delicious.

She was going to purchase the biscotti. But I told her that was a waste of money. I could make biscotti. She agreed and so I did. They turned out quite nicely, thank you very much. I don’t remember what kinds I made, but I do remember that I made a heck of a lot of them. We put three in a package and decorated it with curly ribbon.

As an aside, Bill, Jen and I spent an entire day preparing the gift packages for the guests. In addition to biscotti, she also had little bags of M&Ms. I still can picture Bill preparing those bags.  A handful for the gift bags, a handful for Bill. And so it went.

I hadn’t given biscotti much of a thought since then until our recent visit to Chicago. Wilma had some of the best biscotti I had ever tasted. They had crunchy pistachios and tart cranberries. They were crunchy and delicious when we would dunk them in our morning coffee and eat them without dunking throughout the day until – oops – they were gone.

Where did you get them, I asked Wilma. The answer: Bill’s brother Bruce. Well, of course.

So I sent Bruce an email asking him where he got the biscotti so that we could replace them. The answer will be no surprise to those who know Bruce – he got them at what he calls a salvage store. Bruce is the King of Tuesday Mornings and my bargain shopping hero.

We ended up buying lemon biscotti at Costco. But I couldn’t get the pistachio/cranberry biscotti out of my mind.

So I made some when we got home. And they are even better than those we devoured at Wilma’s. In fact, they are absolutely scrumptious.

Biscotti get their hardness from being baked twice – once in a loaf, and once sliced. There is absolutely nothing difficult about making biscotti, but it takes a bit of time. Time that is so well worth spending….

You first bake the loaf of biscotti.....

You first bake the loaf of biscotti…..

You slice them and bake them individually.

You slice them and bake them individually.


Here is the recipe…. Bon appetito!

Cranberry Pistachio Biscotti
Adapted from Giada DeLaurentis and Food Network

Ingredients
2 c. all-purpose flour
1-1/2 t. baking powder
3/4 c. sugar
1/2 c. butter, room temperature
1 t. grated lemon zest
1/4 t. salt
2 eggs
3/4 c. pistachios, coarsely chopped
2/3 c. dried cranberries, coarsely chopped

Process
Preheat oven to 350 degrees.

Line a heavy large baking sheet with parchment paper. Whisk the flour and baking powder together. Using an electric mixer, beat the sugar, butter, lemon zest, and salt in a large bowl to blend. Beat in the eggs one at a time. Add the flour mixture and beat just until blended. Stir in the pistachios and cranberries.

Form the dough into a 13-in long, 3-in wide log on the prepared baking sheet. Bake until light golden, about 40 minutes. Cool for 30 minutes.

Place the log on the cutting board. Using a serrated knife, cut the log on a diagonal into 1/2 to 3/4 inch slices. Arrange the biscotti, cut side down, on the baking sheet. Bake the biscotti until they are pale golden, about 15 minutes. Transfer the biscotti to a rack and cool completely.

Nana’s Notes: You can dip the cookies in a white chocolate or dark chocolate frosting, but I prefer mine plain. Keep in mind that the cookies don’t rise at all during the second baking, so you can set the biscotti right next to one another on the baking sheet.